Ever thought about creating your own melody and tried to look up on tutorials to help you create them, but got intimidated by how complicated the process looked?
Look no further! We will guide you through the process of creating your own melody with images and simple instructions that are simple to follow and understand! Let’s get started!
Step 1: Download a DAW


There are countless DAWs (Digital Audio Workstation) out there, so it doesn’t matter which one you pick! The 3 DAWs shown above are some DAWs with a simpler UI that is easier to use in comparison to other DAWs with more advanced features.

In case you are wondering, many producers tend to use FL Studio to work with their music as it’s one of the easiest DAWs to use with minimal help. It also has lifetime free updates and its workflow is very user-friendly.
The downside to it is that while it offers a trial version to allow producers to obtain some knowledge and experience in using the DAW, its features are especially limited and the price of the full version is hefty.
Step 2: Install plugins!
Plugins are very useful in creating melodies since they offer many different sound libraries to choose from, each sound special in its own way!

One good plugin is Sakura, which is included in FL Studio and its trial version albeit a demo version. It boasts fantastic sound libraries that captivate and enchants the human ear. It is also fairly popular among producers.
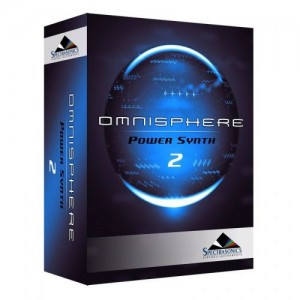
One of the most popular plugins available is Omnisphere by Spectrasonics. Omnisphere’s sound libraries amount to over
10,000 different sounds to choose from. If you’re an avid music fan, chances are that you’ve listened to a track that was produced using Omnisphere.
Although extravagant, it is not without drawbacks as well. It requires a whopping 64GB of your hard drive space and costs over $100 – a small price to pay.
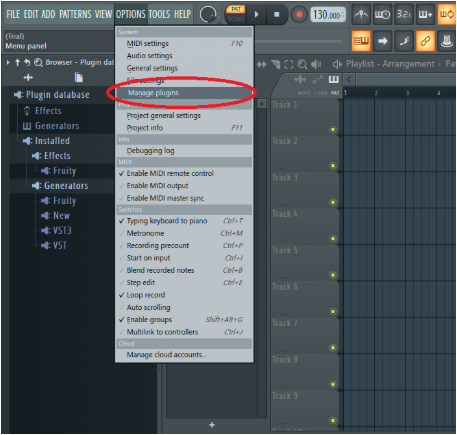
Step 3: Set up your project
Once you are in your DAW, locate the menu and search for an option that allows you to manage your plugins. Import your plugins from your folders and you’re good to go!
Next, set the tempo of your project to your desired speed!

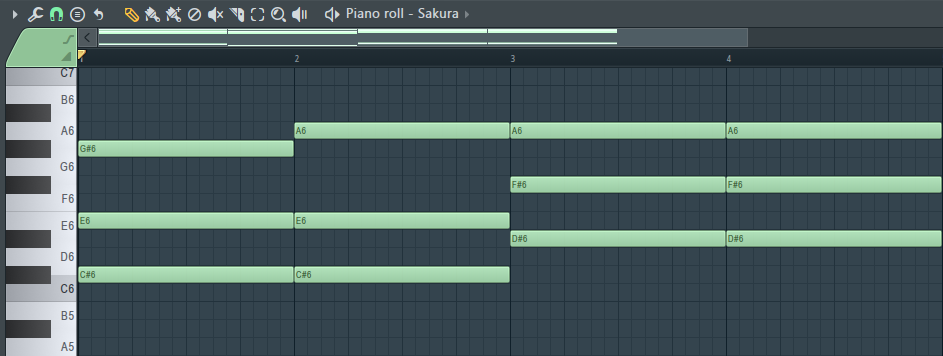
Step 4: Create chords
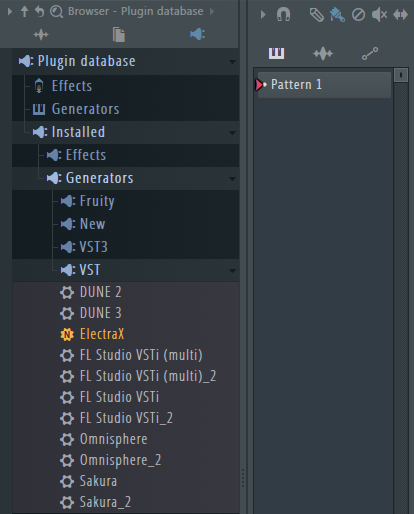
Open up the piano roll as shown below:
(The 2nd icon to the right of Pattern 1 Bar)

We are using Sakura to create some simple chord patterns.
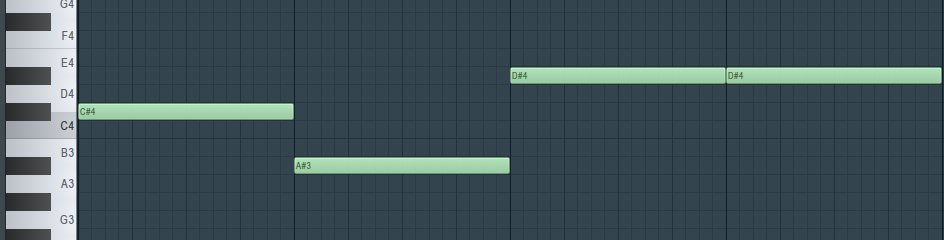
Next, add some bass notes:
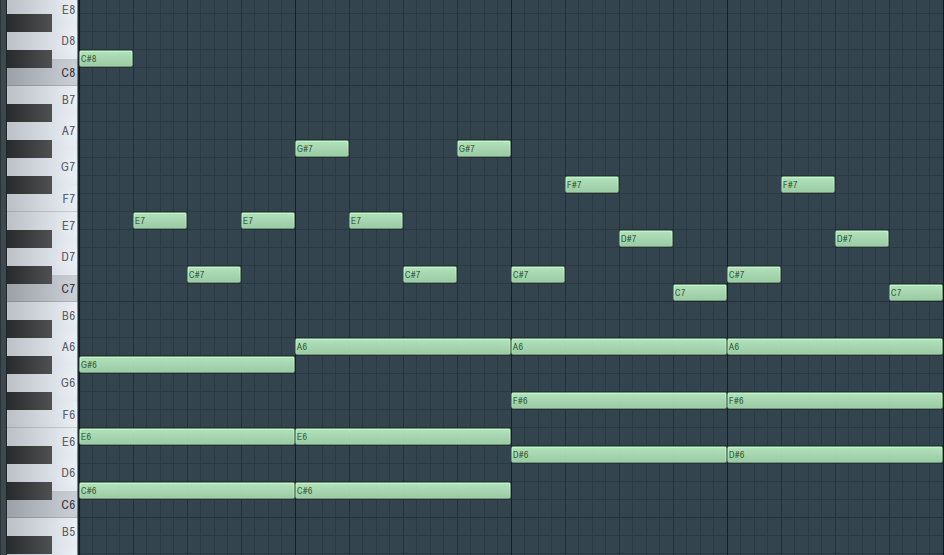
Step 5: Create the melody!
Now that you’ve got your chords, start creating your melody:
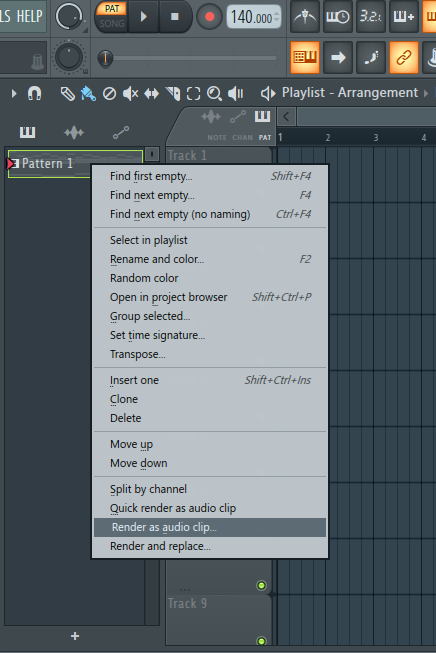
Step 6: Render your pattern
Finally, render the precious music that you’ve just created! Head back to your playlist.
(The 1st Icon to the right of the Pattern 1 Bar)
Right-click on your pattern and click on ‘Render as audio clip’.
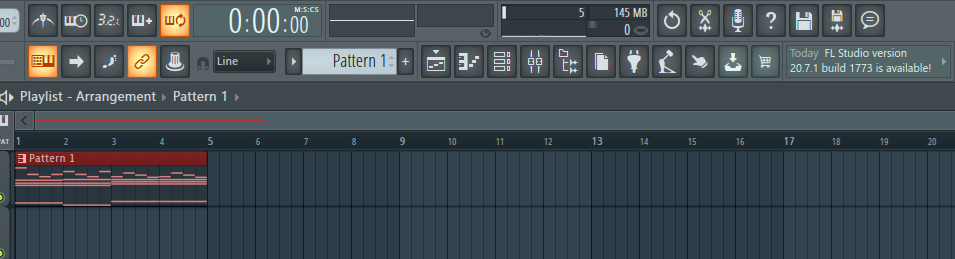
Additionally, you can click on the icon highlighted. Its the Plus sign under the floppy disk. It’s the same, just that you can render your audio file to your desired location.
Step 7: DONE!
Edit your render settings to best suit your preferences.
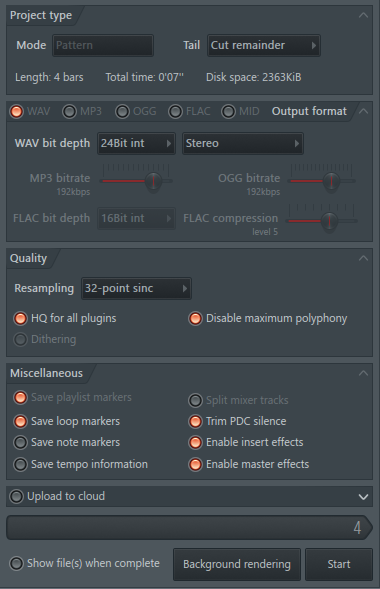
Once you’re done, click on the ‘Start’ button and wait for your audio to render.

Once it’s done rendering, locate your audio file in the location you’ve just saved it to.
Congratulations! You have successfully rendered your melody and it’s available for you to do what you want with it now!
What now?
You’ve understood some basic music theory and created your own melody! Simple, right? So be sure to continue experimenting with different sounds and audio effects to produce the perfect sound!
Here’s the full sample of the audio as promised!
Stay tuned for the next article tomorrow where we will be switching gears and be providing a 3-part tutorial on concept art! Follow @amphibistudio and @projectj2k for updates.