

To start off, some basic information about Figma
Figma is an online collaborative prototyping and design tool used by many UX/UI designers. Our series called “Figma features you can’t find in Adobe XD” will guide you through the unique features in Figma and these features are easy to use, even for beginners.
We compare it to Adobe XD, another prototyping tool used by many UX/UI designers as well. The reason why we specifically chose Adobe XD is that the students in Immersive Media in the school of Ngee Ann Polytechnic learn Adobe XD for their prototyping needs.
This article does not intend to discriminate against any prototyping tool mentioned and it is for educational purposes only.
Feature 1: Figma Frames

The most basic and important feature is Frames. They provide the canvas for all of your designs and can come in any size. You can make your frame the size of the latest iPhone 12 Pro, a tablet or your current laptop or computer size. It is entirely up to you and depends on what platform you are designing for most of the time.
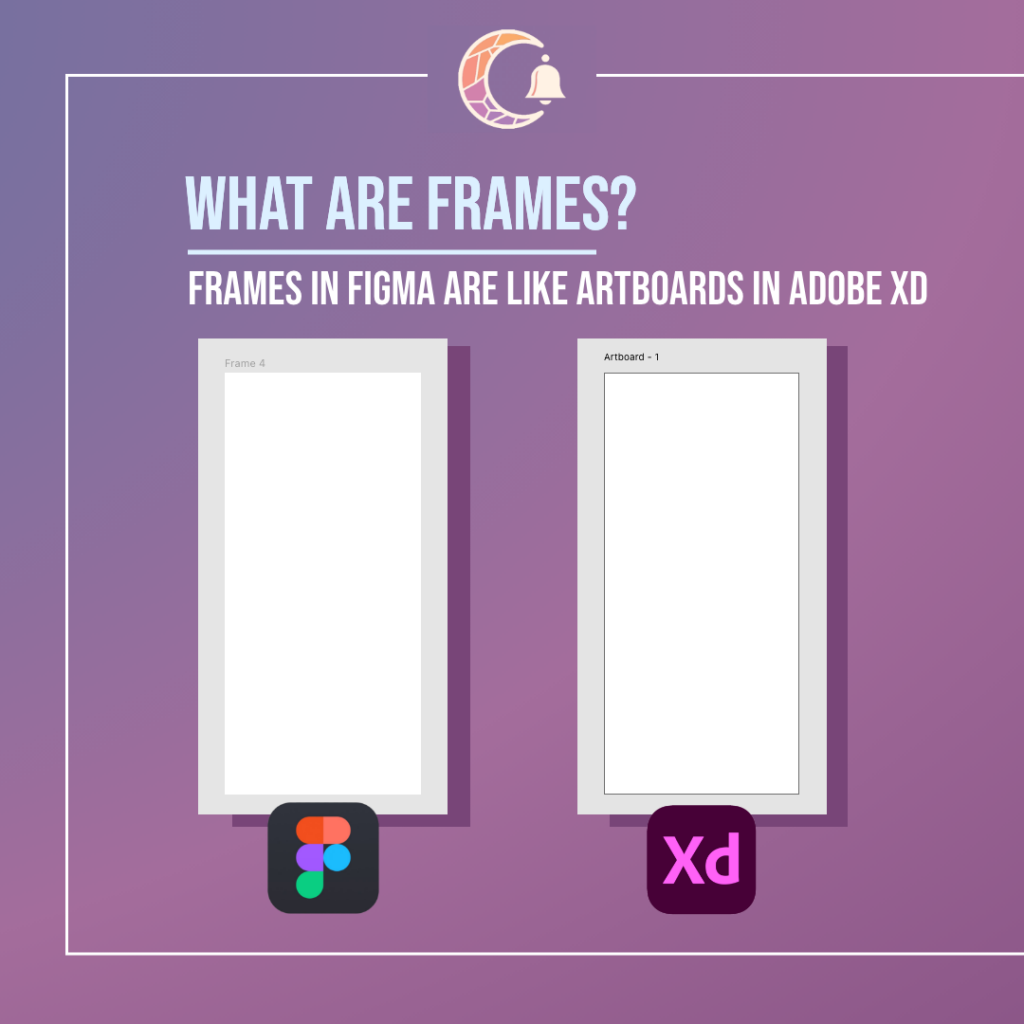
It is similar to artboards in Adobe XD if you have used Adobe XD before. You can name the frames whatever you want by double-clicking the text above it, just like artboards. You can also move the position of the frames to where you want, which helps to arrange all your frames neatly, especially if you have an enormous amount of frames for your prototype. Just drag the title of the frame and the entire frame will move along with it.
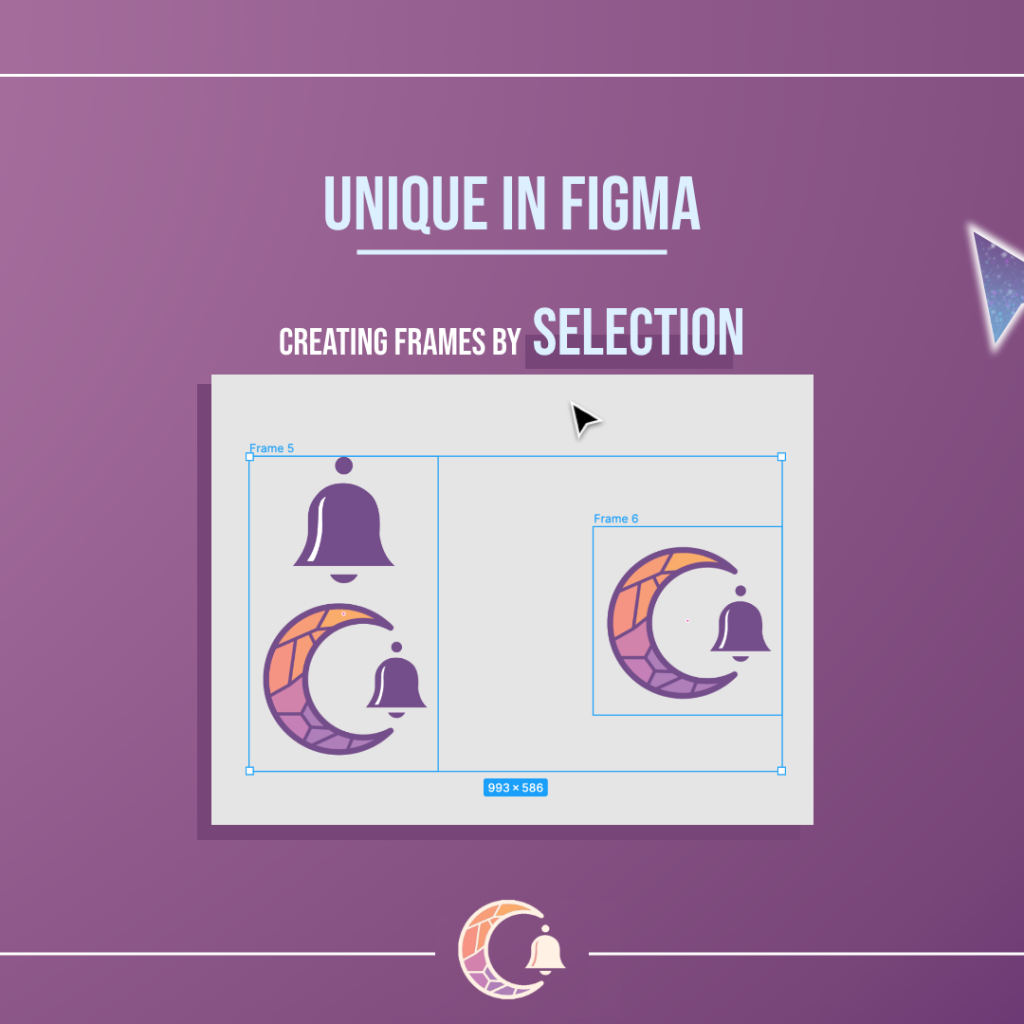
Onto the feature that is unique to Figma which is creating frames based on your selection. This is helpful when you have assets that do not belong to any frames, but you still want to keep them organised and neat. Instead of dragging manually all the assets to a newly created frame, try this method.
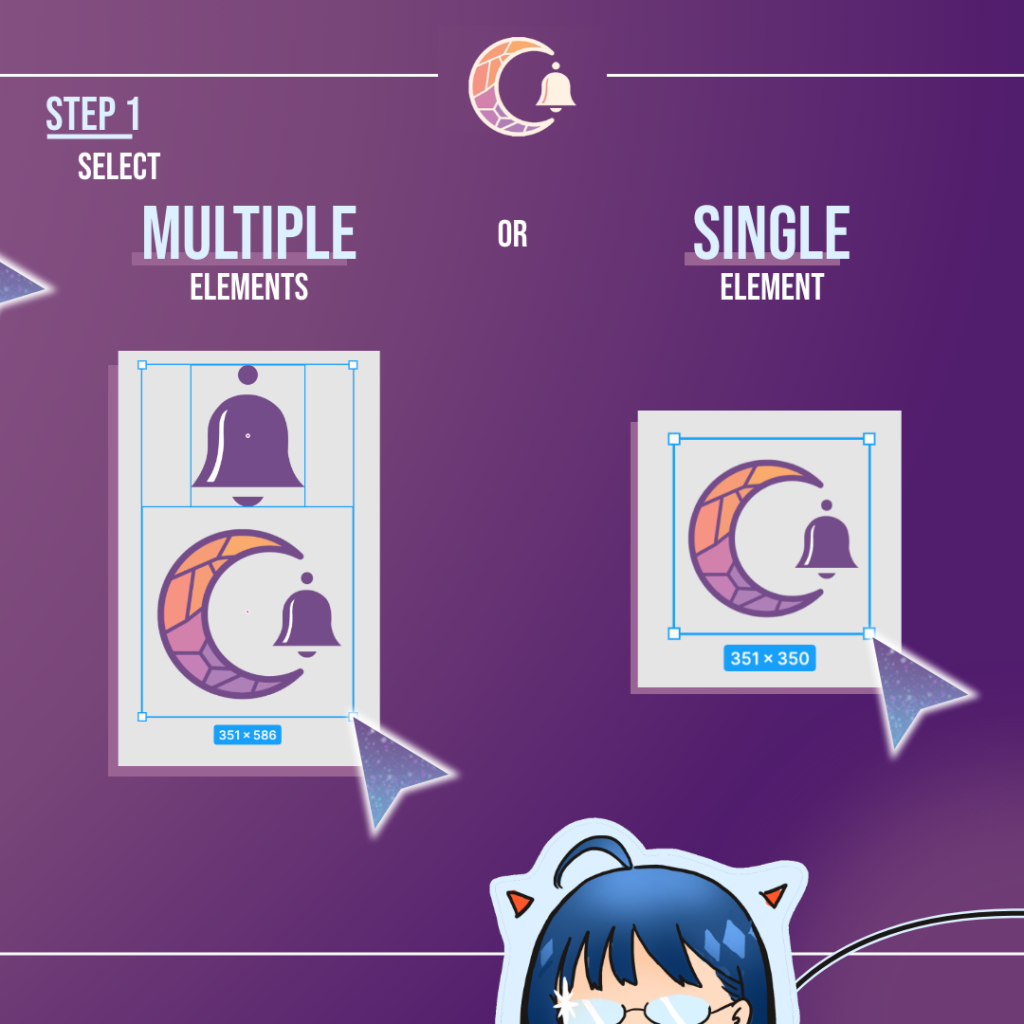
Step 1: Make your selection
You can choose to select multiple elements to do this or just a single element as shown in this image on the left. Make sure you see the blue box encompassing your elements to ensure that they are selected.
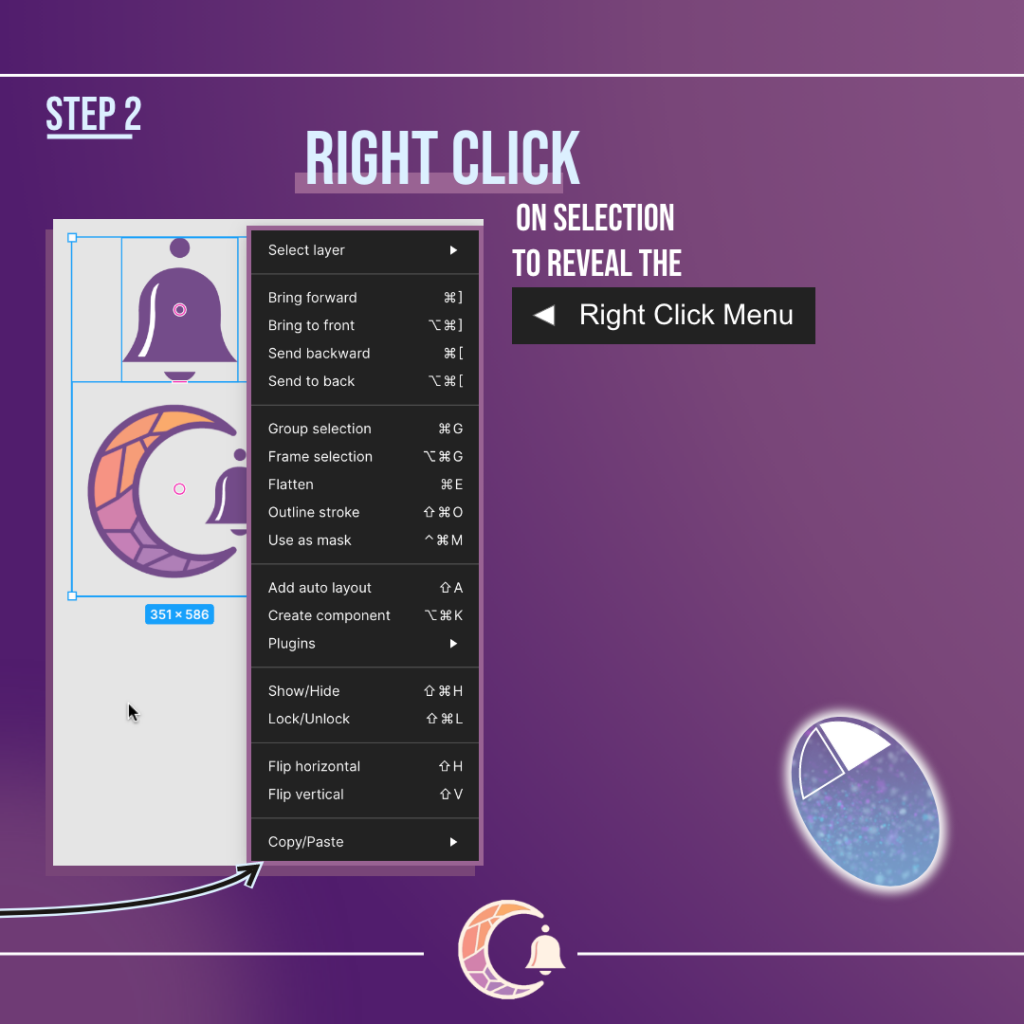
Step 2: Right-click on the selection
Right-click on the things you have selected to reveal the right-click menu.
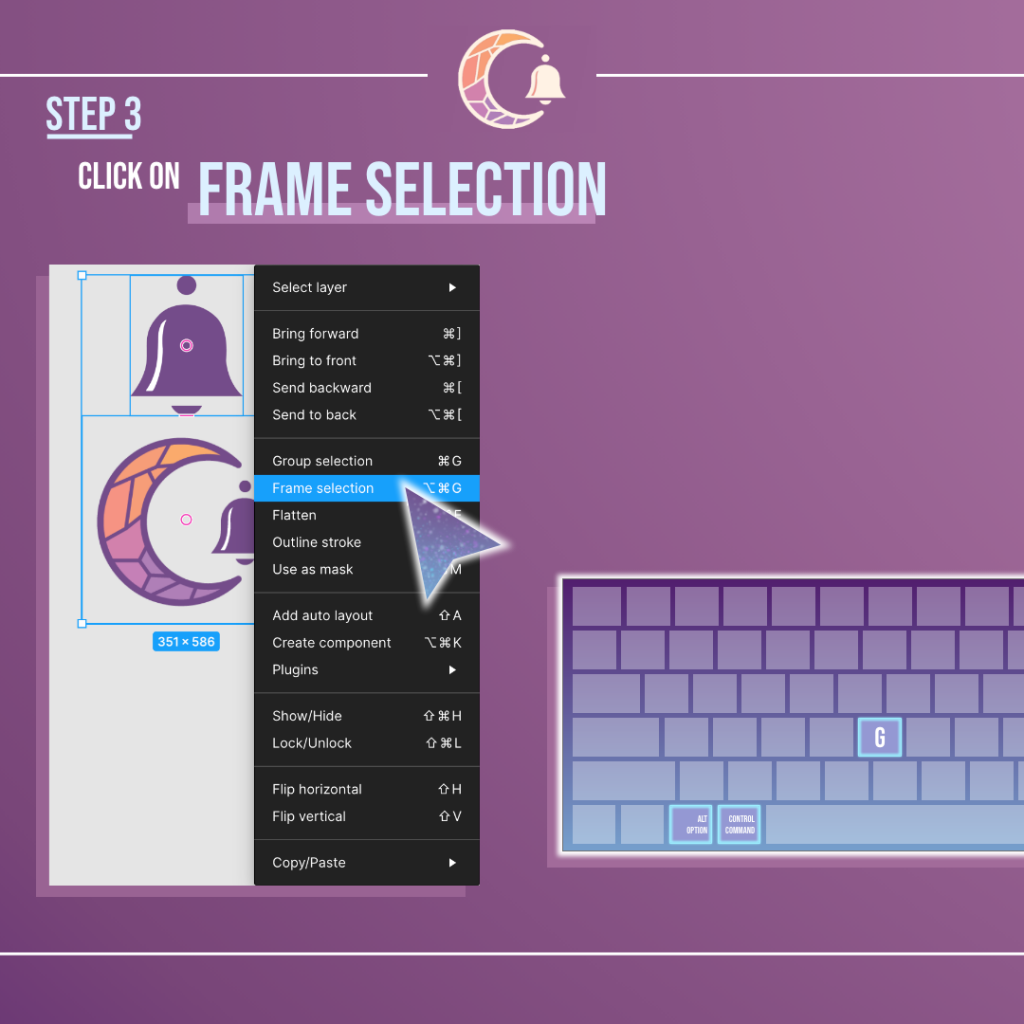
Step 3: Click on Frame Selection
To create a frame encompassing what you have selected, click on frame selection in the right-click menu.
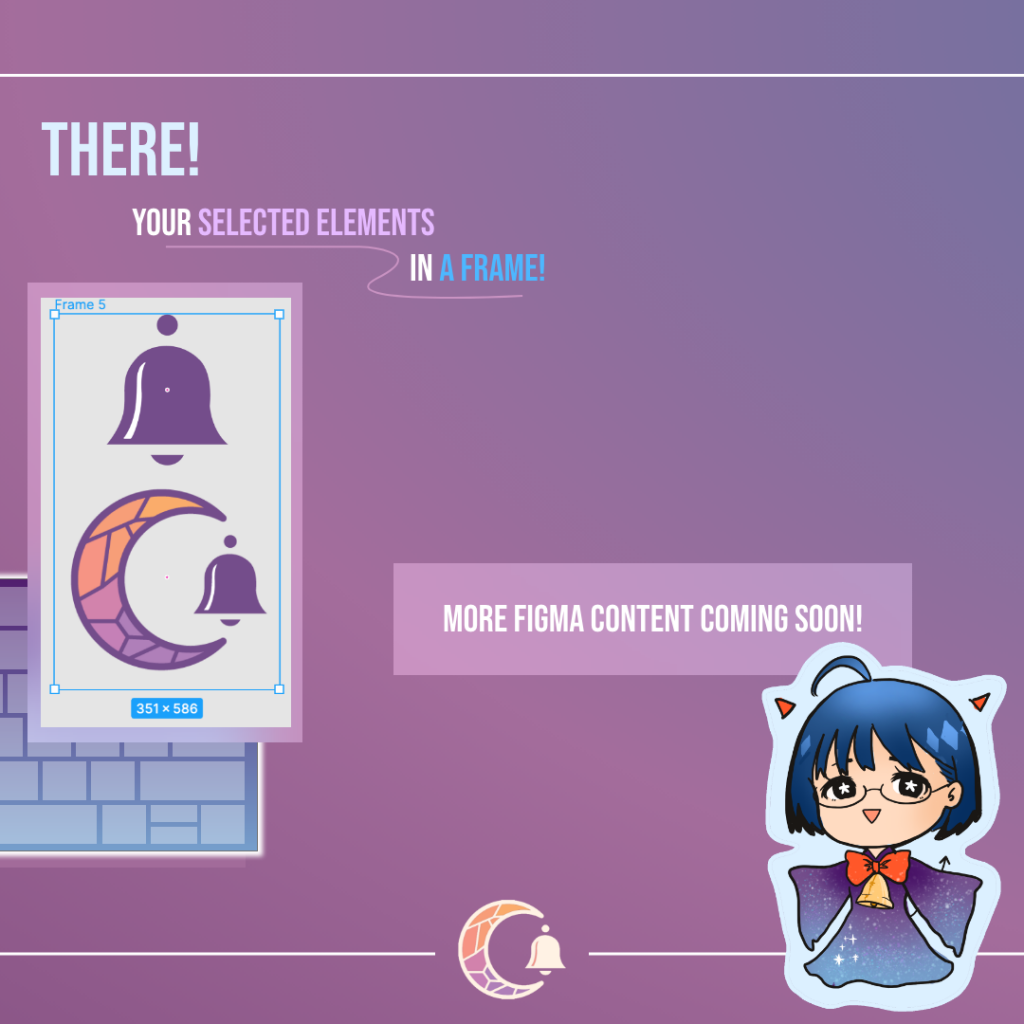
Completed!
Just 3 steps to create a frame for what you have selected. It is quick and easy and can be really helpful at times.
Feature 2: Figma Styles

Styles can be a good way to apply all the same properties to your font when you don’t want to remember the hexadecimal code, font family or even font size. In Figma, there are text styles and colour styles that you can make use of.
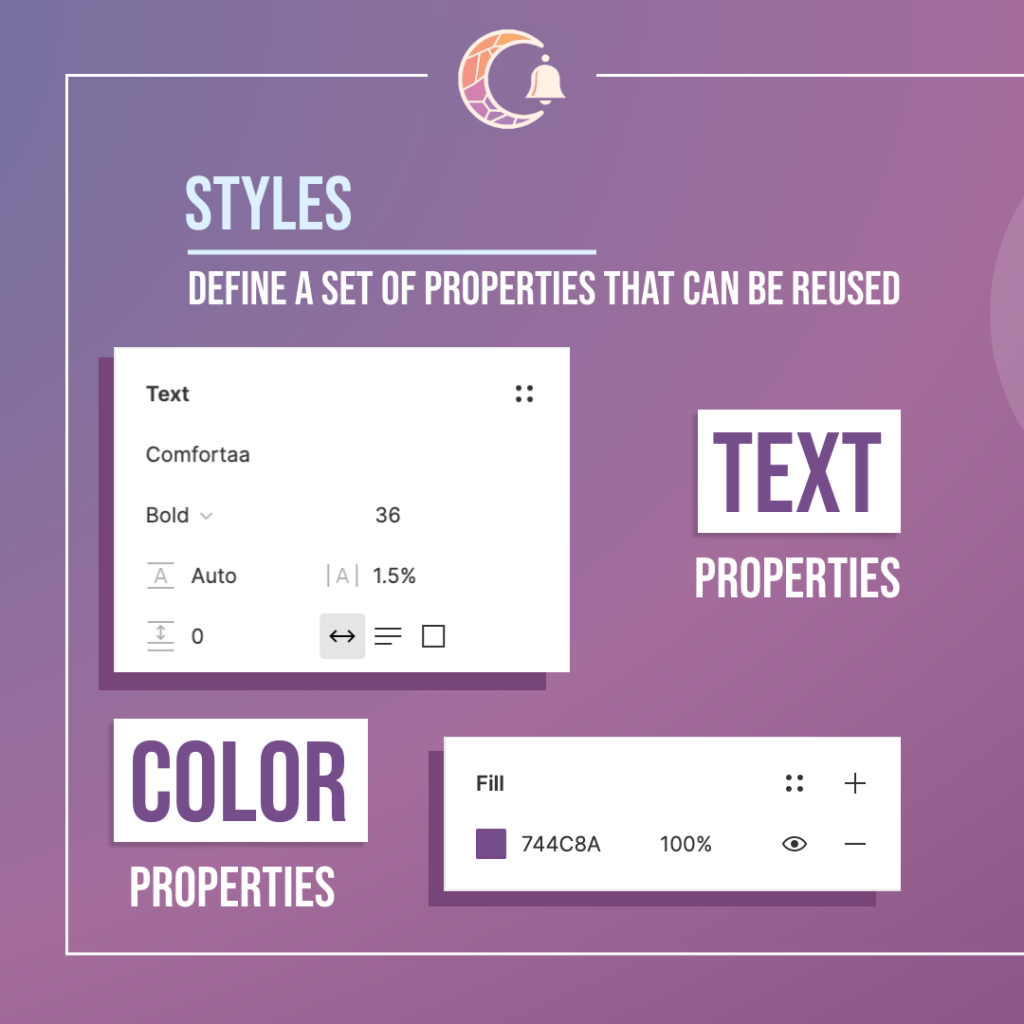
Text styles define text properties define the font family and font size while the colour styles define colour properties which refers to the hexadecimal code.
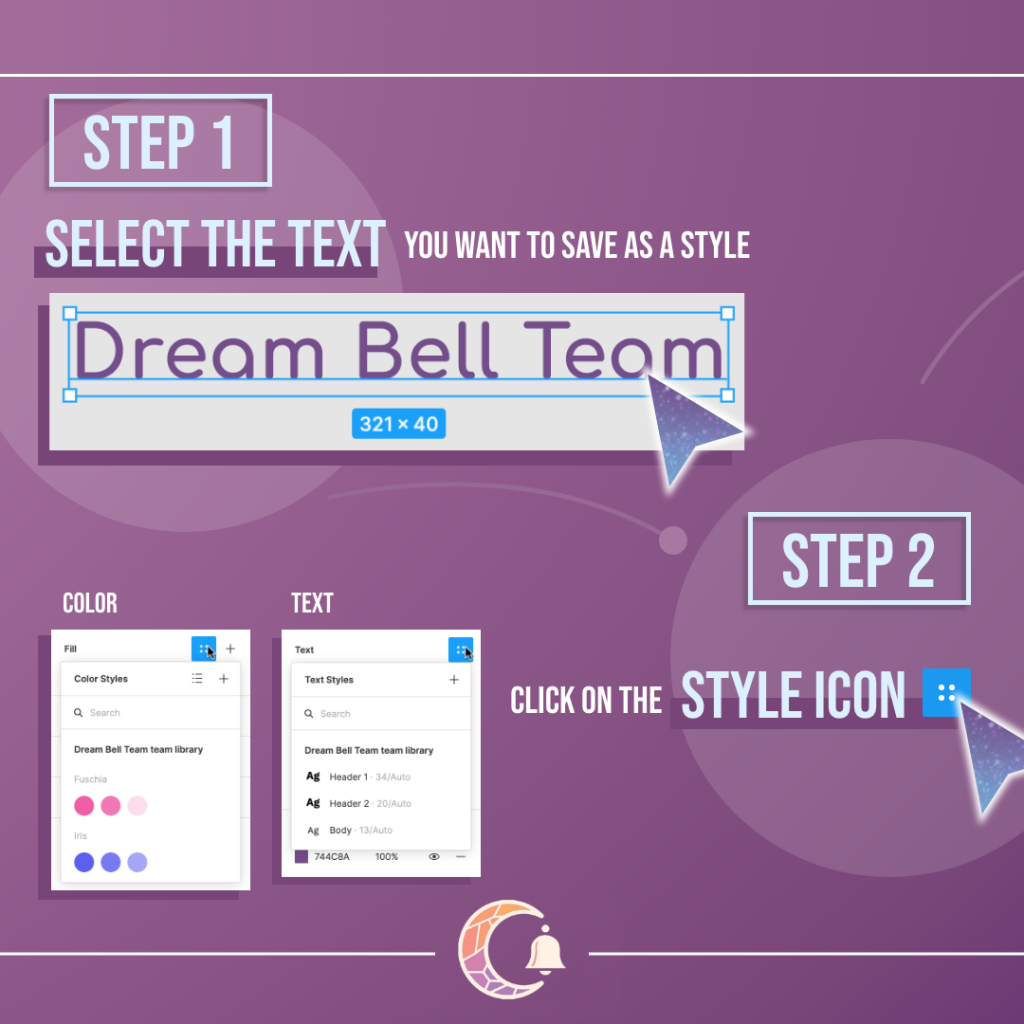
Step 1: Select the text to save the style of
To start saving a style, click on the text that has the properties of the style you want to save.
Step 2: Click on Style Icon
Click on the blue colour icon, which is the style icon to reveal another menu. If it is a colour style you want to save, click on the style icon beside the word “Fill”. If it is a text style you want to save, click on the style icon beside the word “Text”.
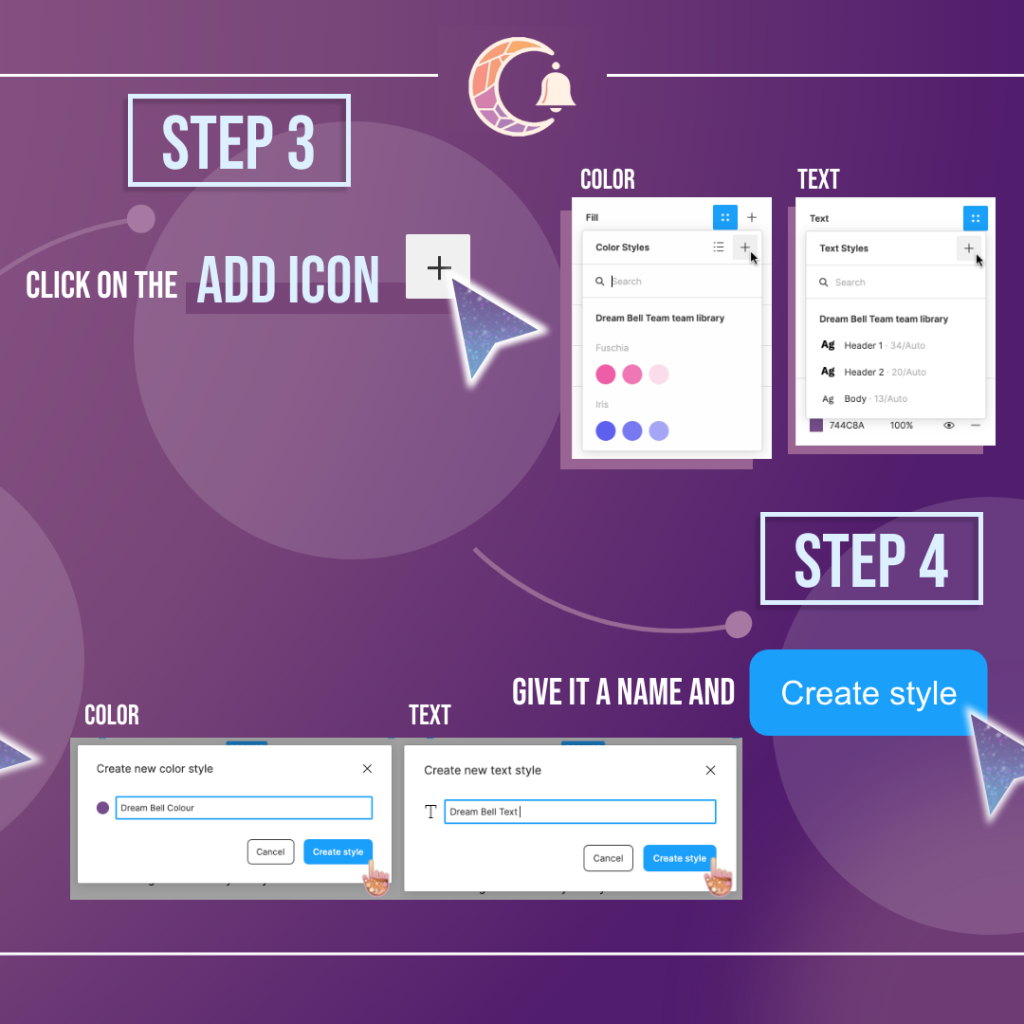
Step 3: Click on add icon
Add it as a style by clicking on the plus icon in the menu that was revealed by the style icon.
Step 4: Give it a name and “create style”
Type in the name you want to give to the style and then click on the button “Create style” to save the style.
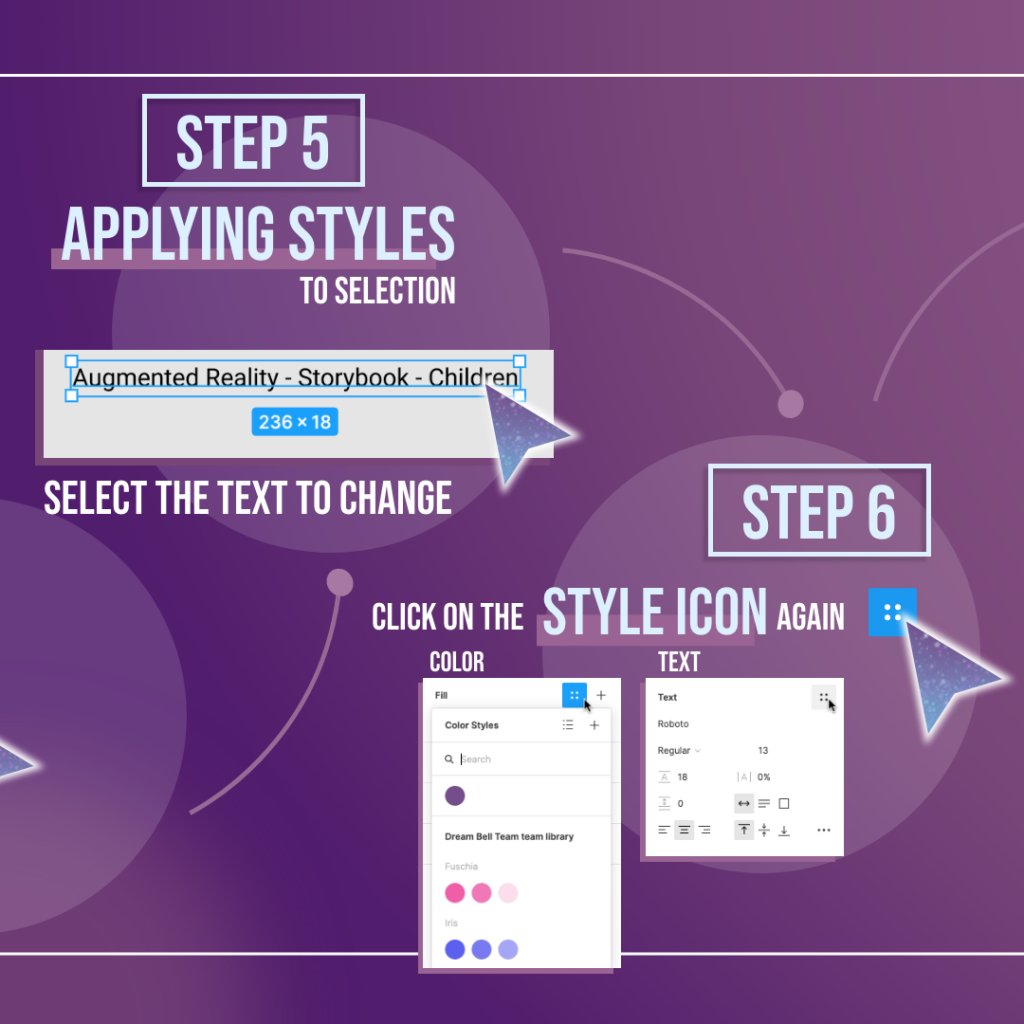
Step 5: Select text to change the style of
To start applying styles, select the text you want to apply the style on.
Step 6: Click on style icon again
Click on the style icon to reveal the menu that stores your saved styles.

Step 7: Select the saved style
Click on the saved style to apply it and see the changes that take place on your selected text.

Completed!
Look at how much the text have changed once we applied the style. You only have 4 steps to save the style for infinite usage and 3 steps to apply it to any text you selected.
Feature 3: Adjusting position
Smart selection is one of the features in Figma that I really wished Adobe XD has. Smart selection has two helpful methods which I would like to share with you. Firstly, it would be swapping the position of elements.
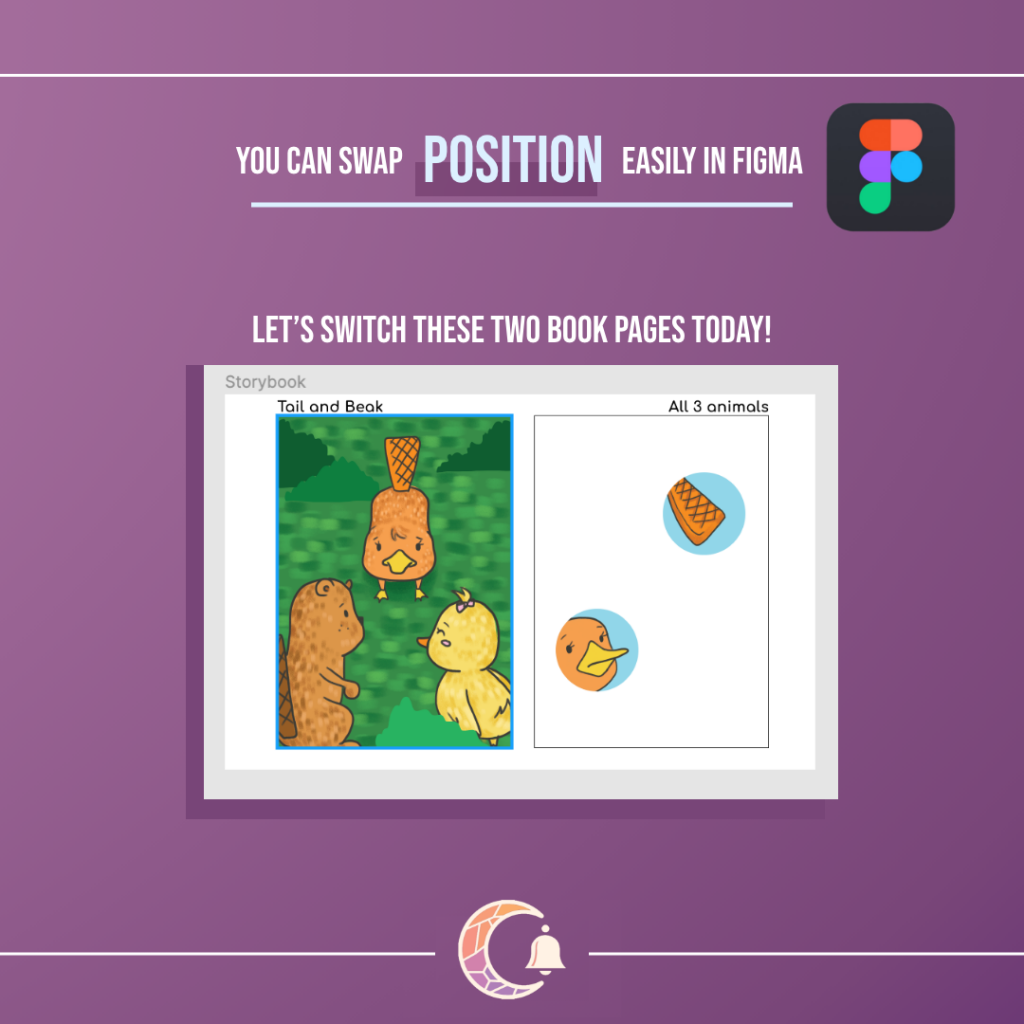
Today, let’s swap the places of these two images which is from Dream Bell Team’s very own children’s storybook, Where’s My Family.
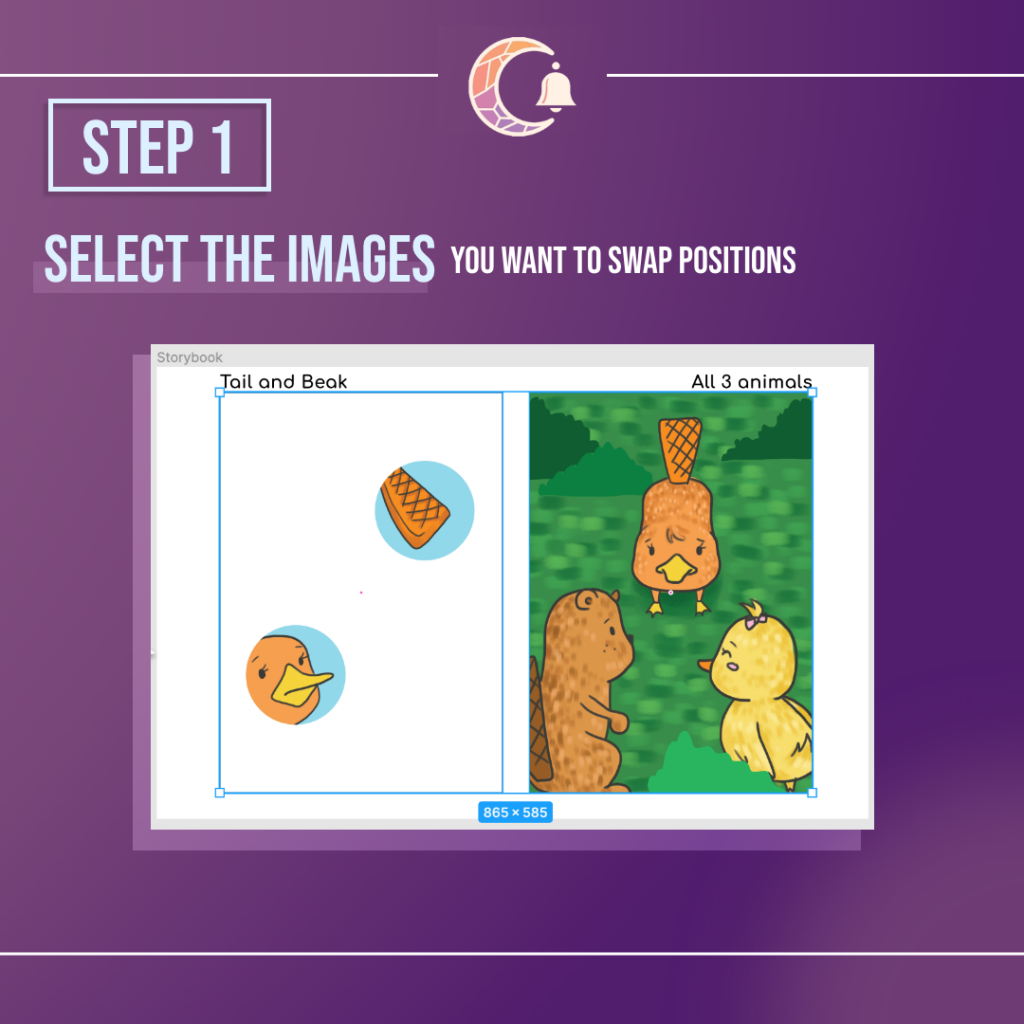
Step 1: Select the images to swap
Select both of the images that you plan to switch positions of. You can select multiple images that you want to replace the position of. It is definitely not limited to 2 images.
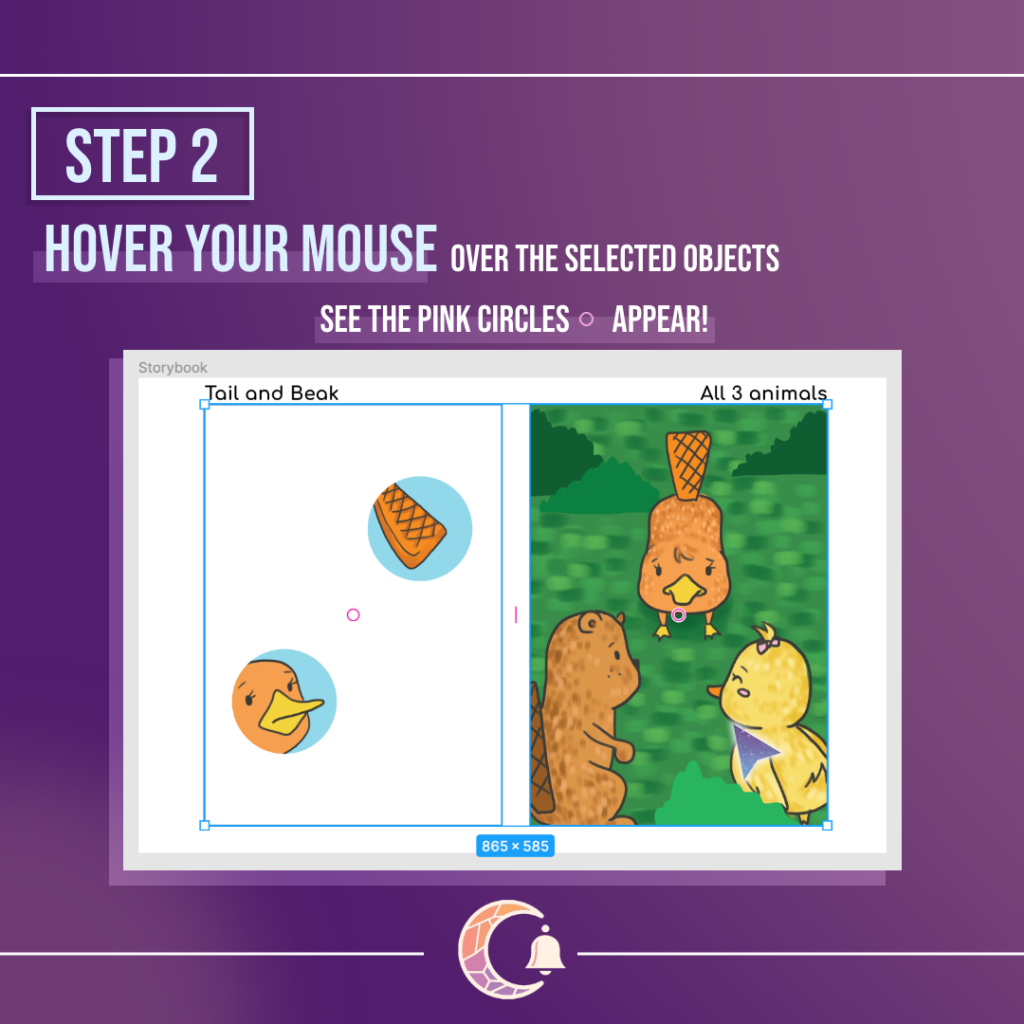
Step 2: Hover your mouse over the selected objects
When you hover your mouse over the selected images, a pink circle should show up for each image. The pink circles assist us in adjusting positions.
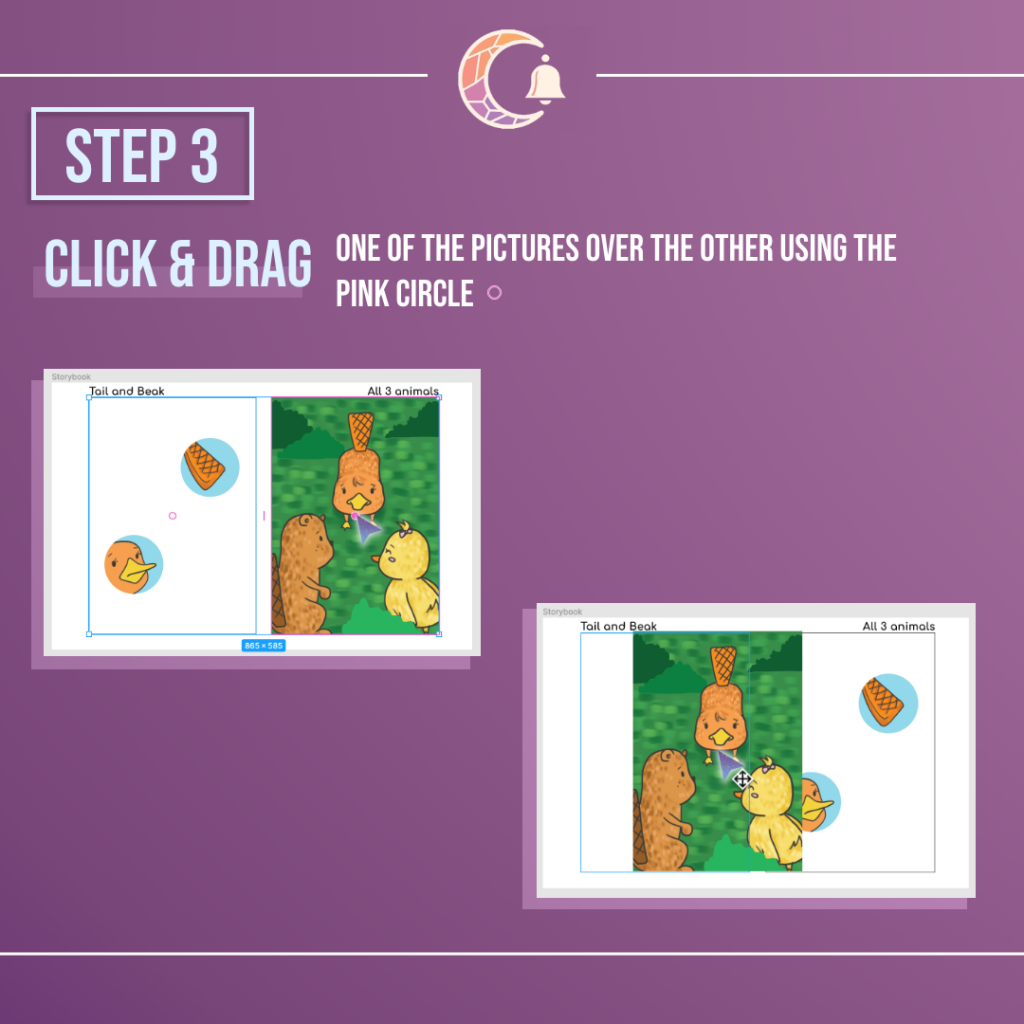
Step 3: Click and drag the pink circle
Decide which image you want to move and click and drag it using the pink circle over the position of another image that you want to replace. The images will automatically move themselves to fill up the space where the moving image once was.

Completed!
In just 3 easy steps, you can swap the position of an image with another. This is especially helpful when you have a lot of images to shift the position of and you don’t want to lose sight of the original alignment.
Feature 4: Adjust spacing
Another great smart selection feature is to adjust the spacing between the images. This really helps in the consistency of the user interface and it is something I wished Adobe XD has. I found it pretty hard making sure there is the consistent spacing between each image in Adobe XD and this would have definitely come in helpful.
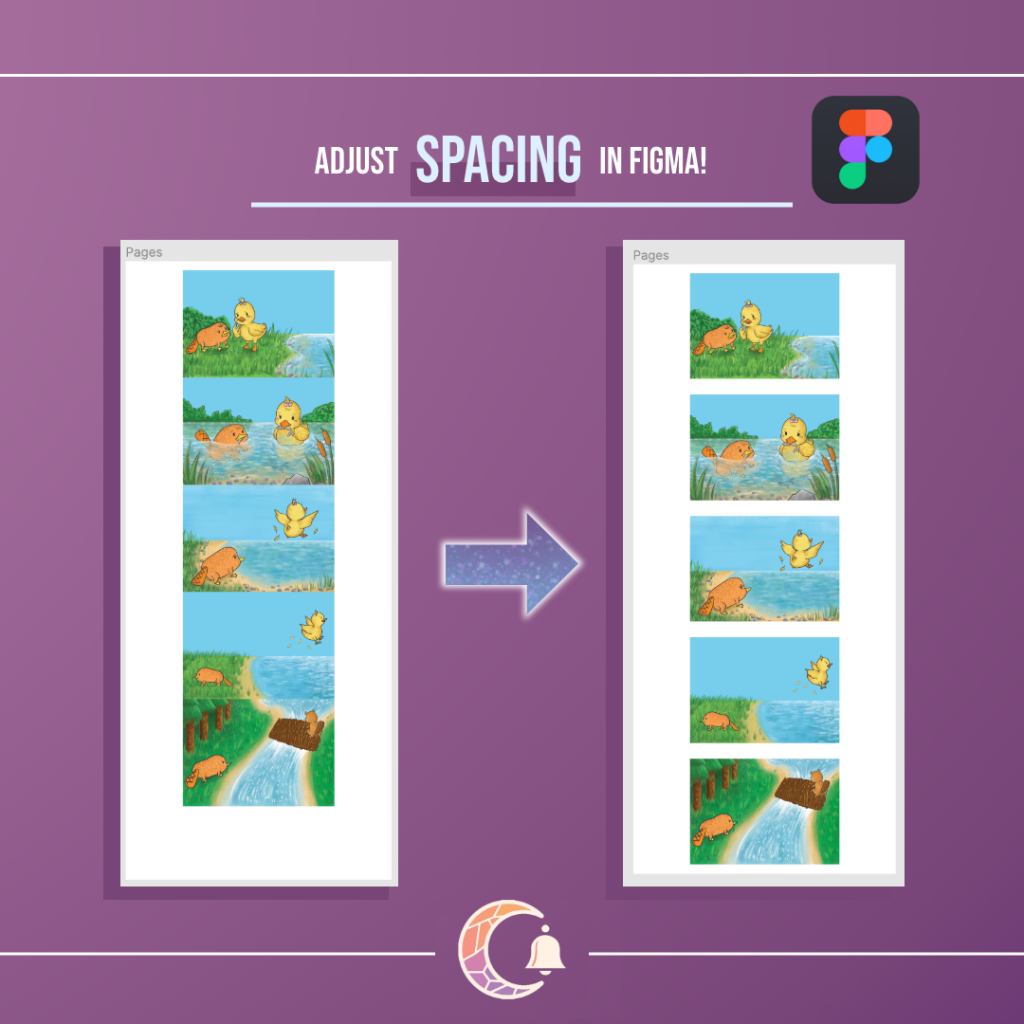
I am going to show you how I changed from no spacing to equal distance in Figma using smart selection in just 3 simple steps. The images are from our book
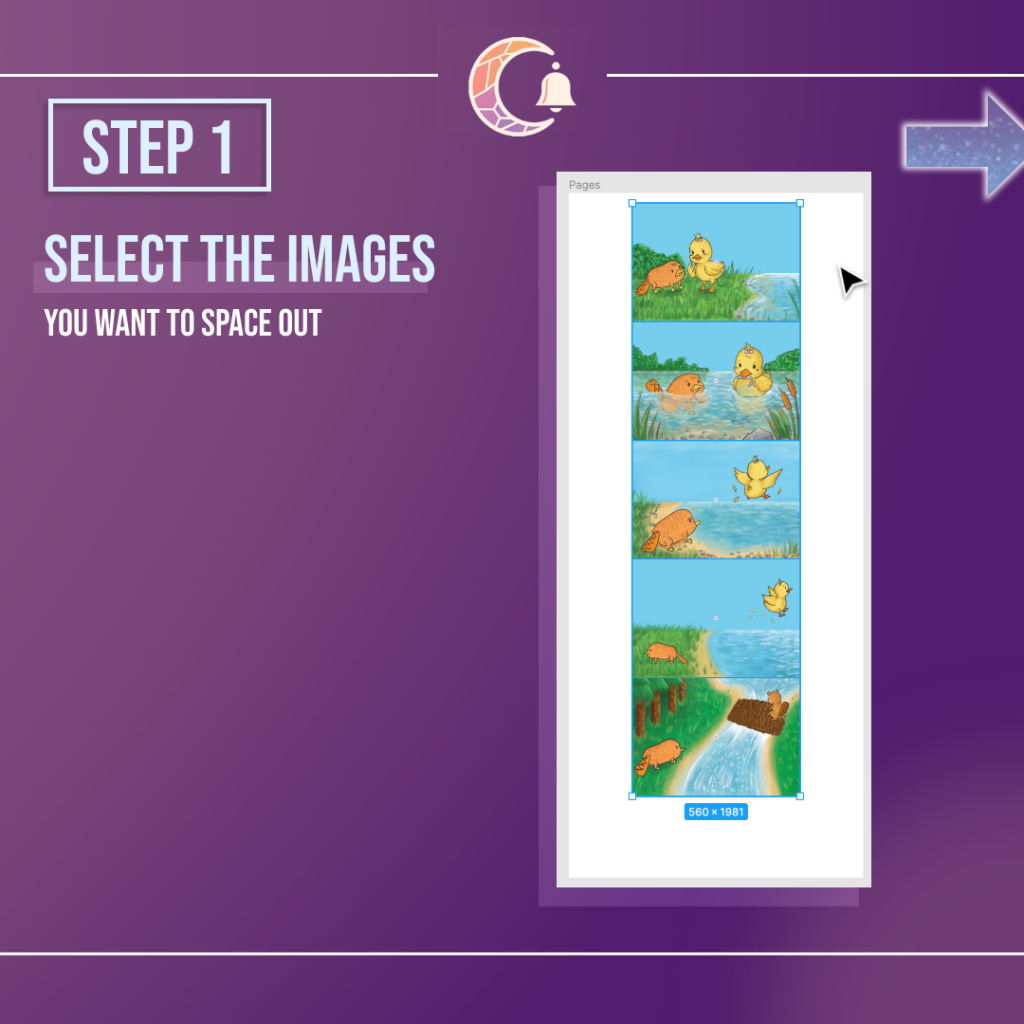
Step 1: Select the images to space out
Over here, I have selected all 5 images as I want to space them out equally so that they look more organised. You can tell they are selected with the blue rectangle outline and the dimensions written below it.
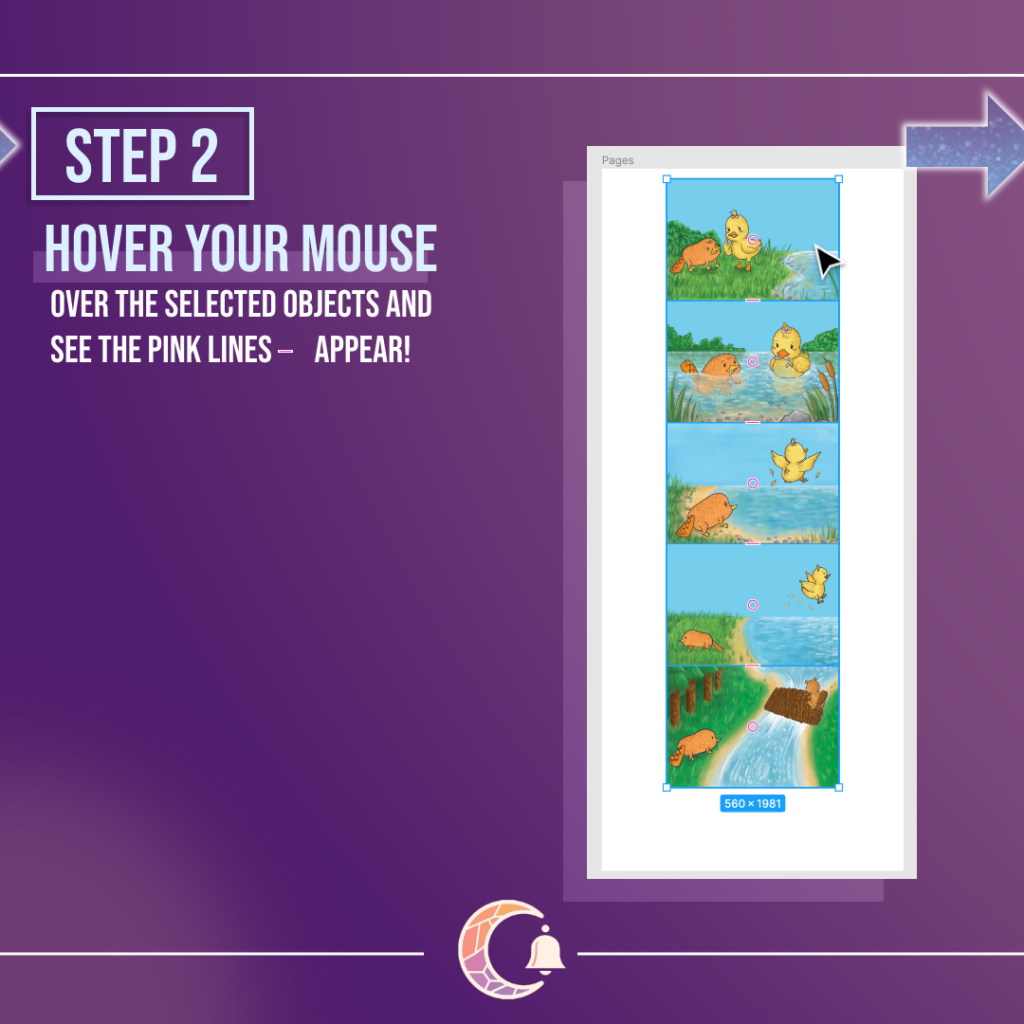
Step 2: Hover your mouse over your selection
When you hover your mouse over the images, you should be able to see little pink lines between the images. This will play an important role in adjusting the spacing equally.
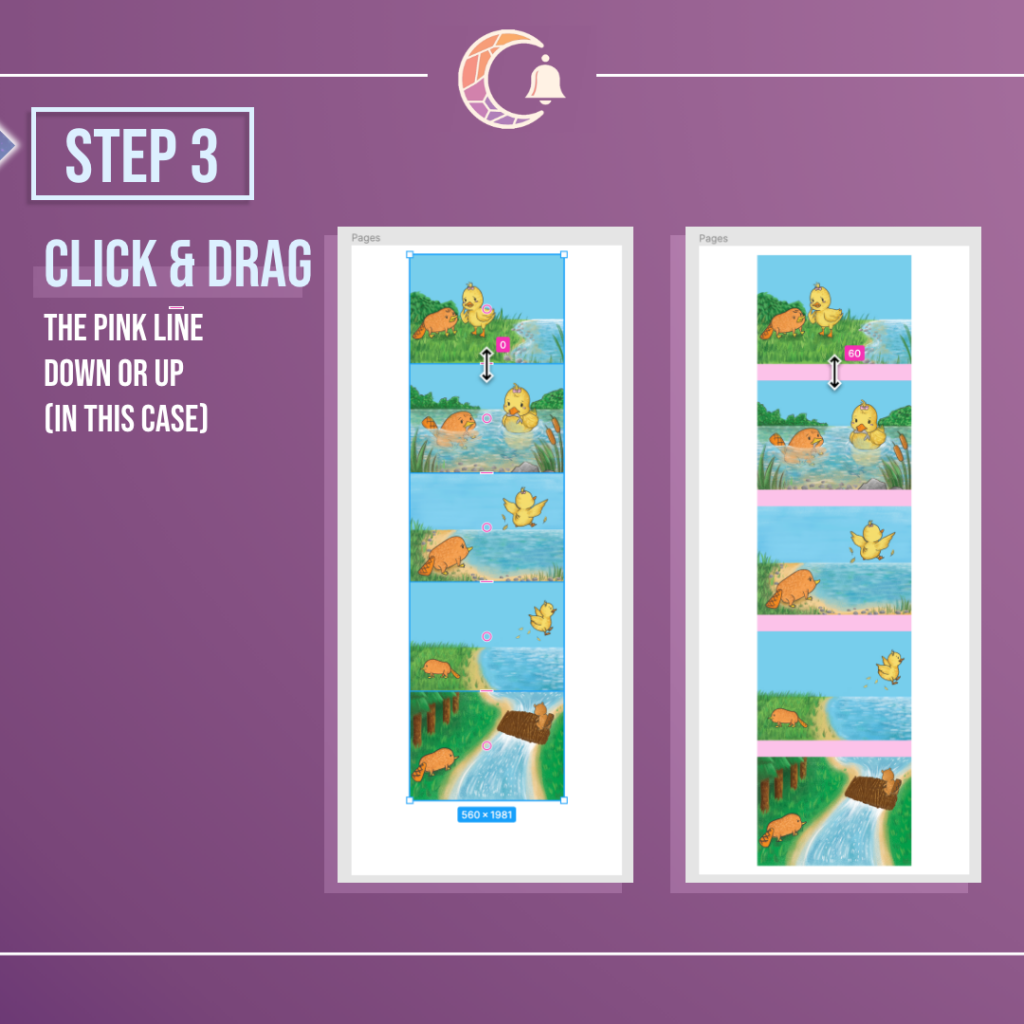
Step 3: Click and drag the pink line
Since my images are arranged vertically, I would have to drag them either up or down. I drag the pink line downwards in this case, allowing the spacing between each image to increase. If I want the spacing to decrease, I would have to drag it upwards. Horizontally arranged images would require left and right dragging instead.
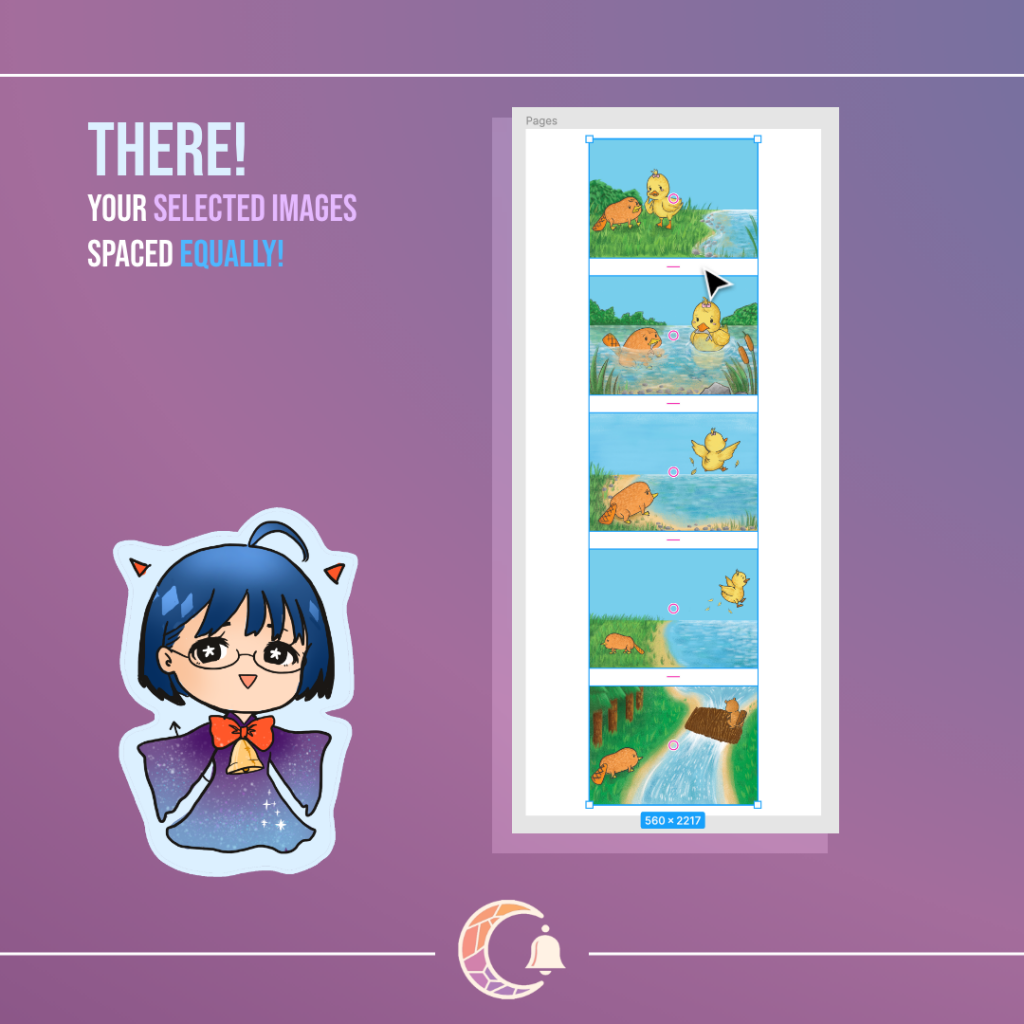
Completed!
Now my images are spaced out equally and it looks less cluttered and cramped as compared to before!
Feature 5: Commenting
One useful collaboration tool is commenting which is really helpful in communication within the document itself. Feedback and messages can be pinpointed on specific areas.

I will teach you how to leave a simple comment when collaborating with your teammate in Figma. In this example, I will be using the ribbon as a guide.
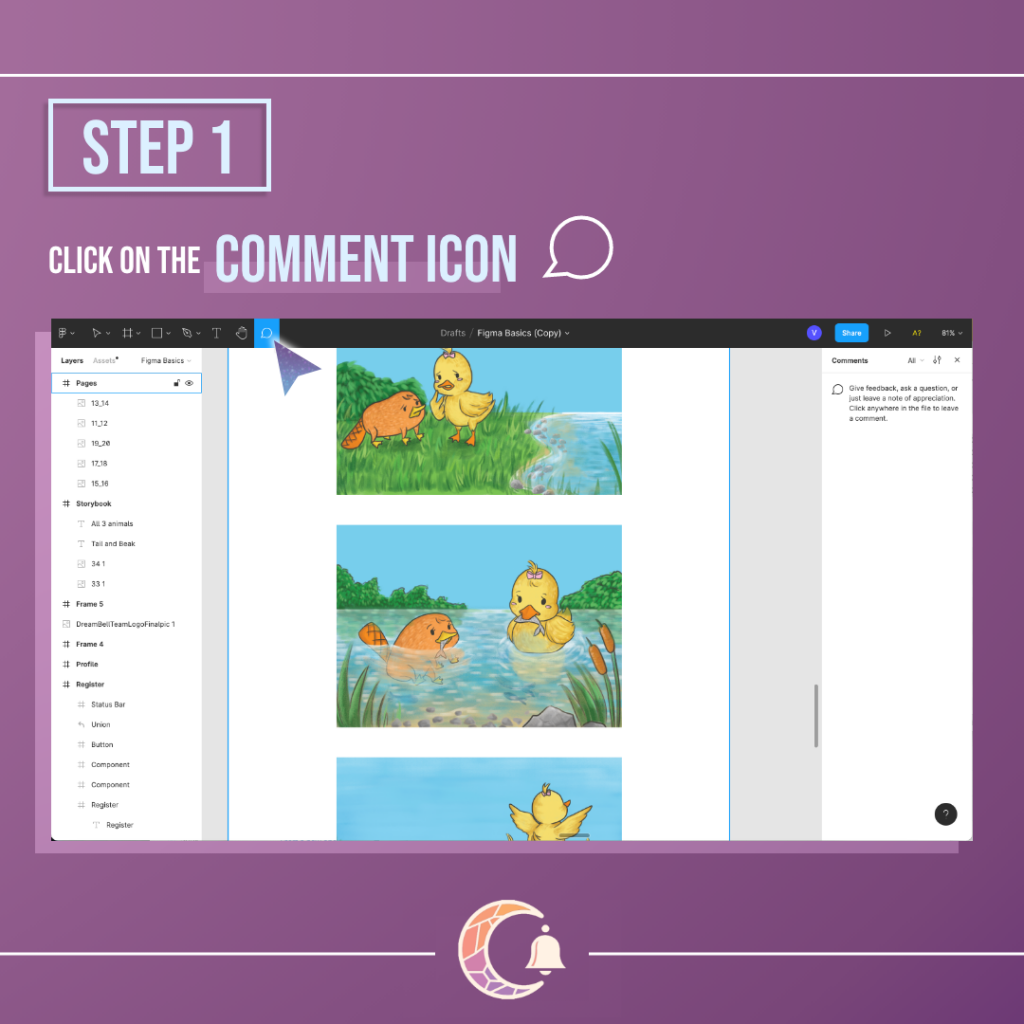
Step 1: Click on comment icon
To change the mouse to the comment cursor, click on the comment icon so that you can leave a comment where you click.
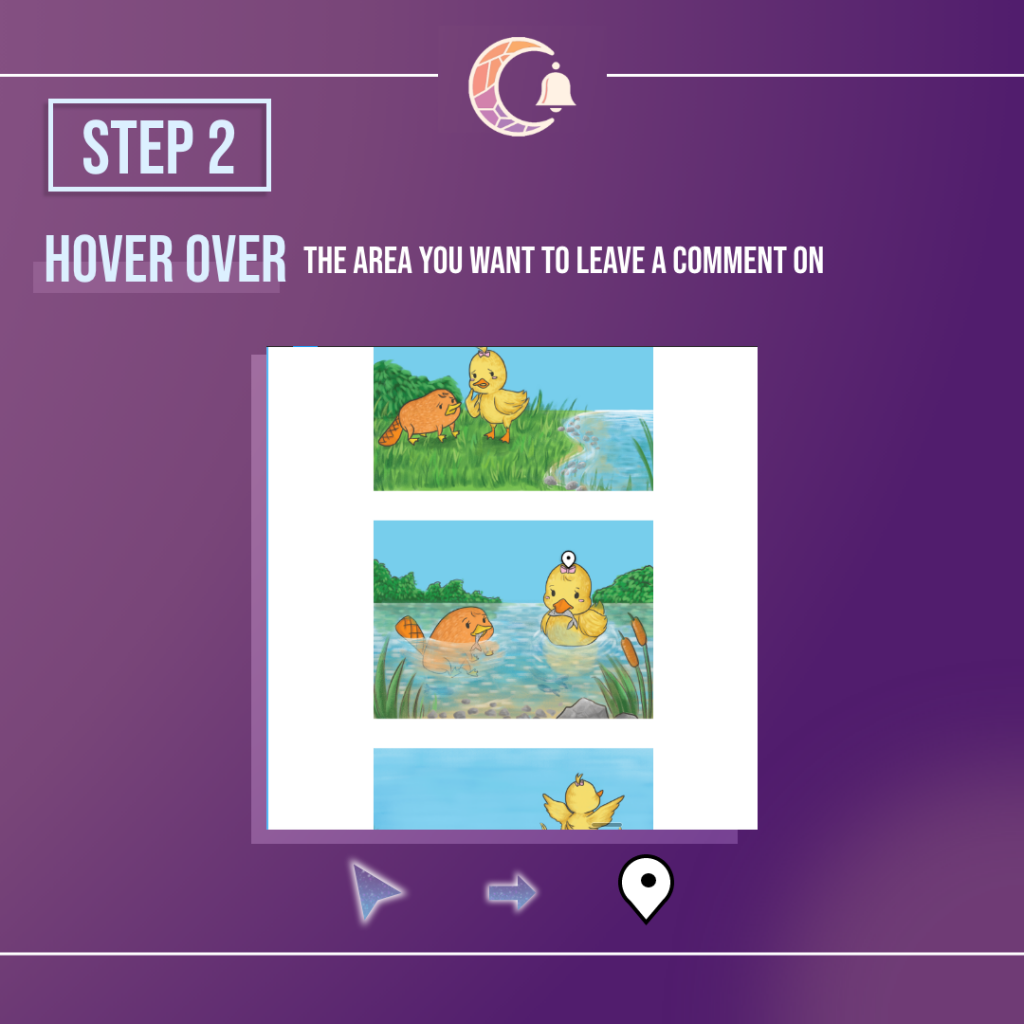
Step 2: Click on the point to leave a comment on
You can leave a comment on a specific area of the design within the Figma document. It is up to you where to leave it as you have control over it with the comment cursor.
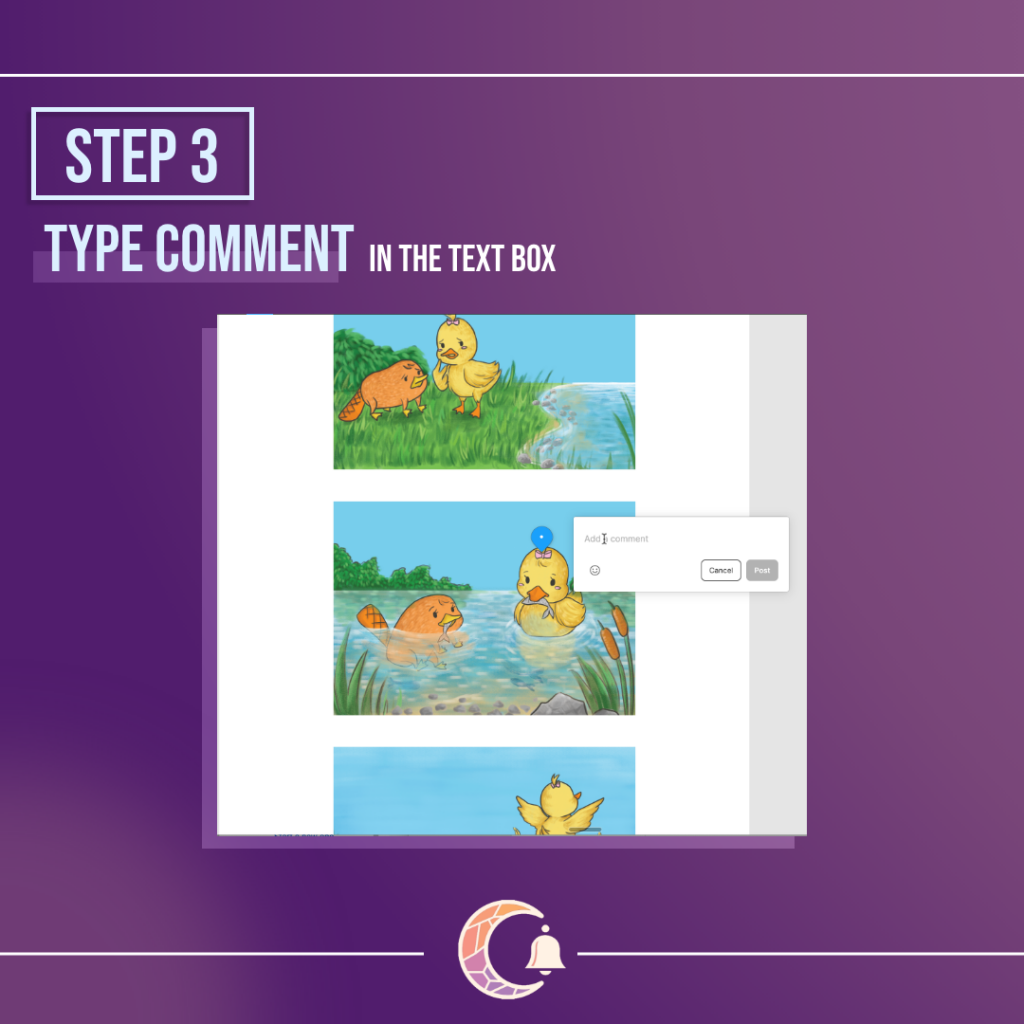
Step 3: Type comment
Type your comment into the text box that appears after you click. You can add emojis within your comments as well.
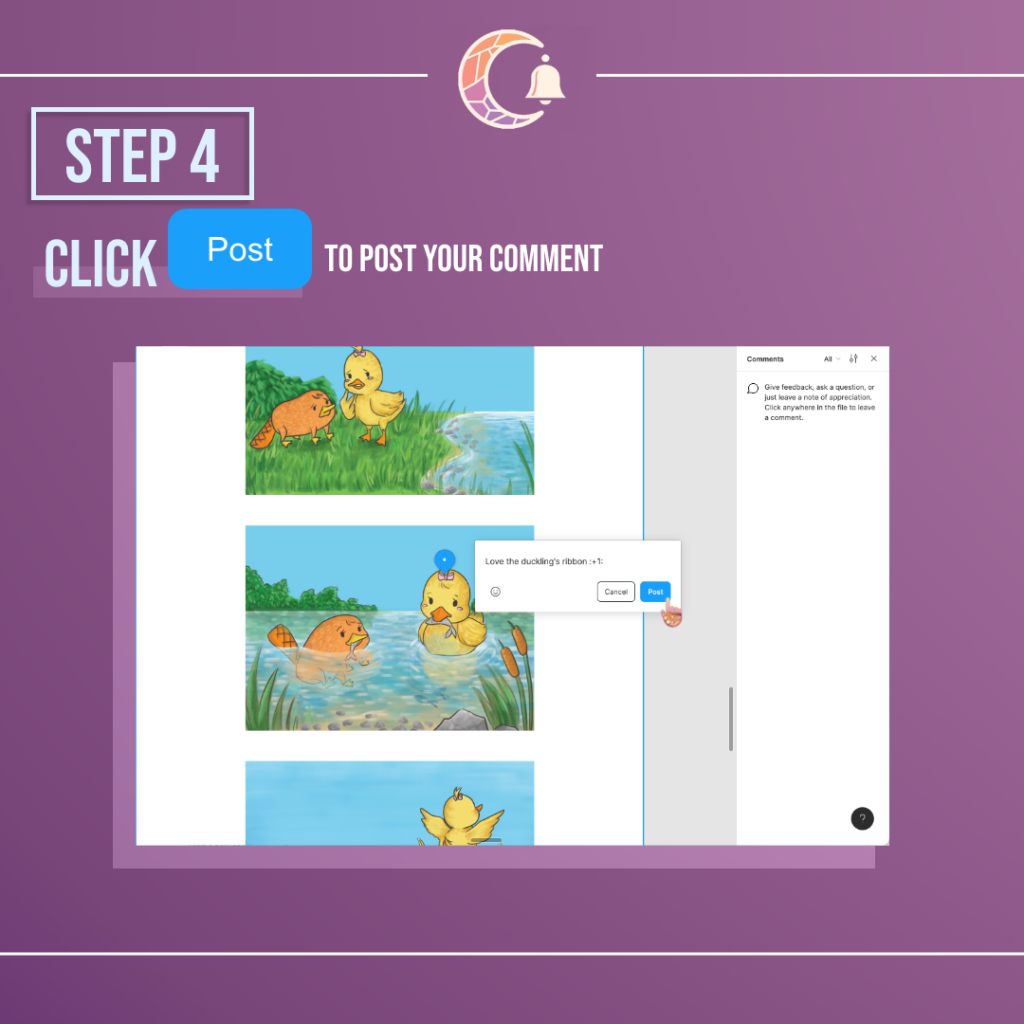
Step 4: Click “post”
Post your comment by clicking the blue “post” button.
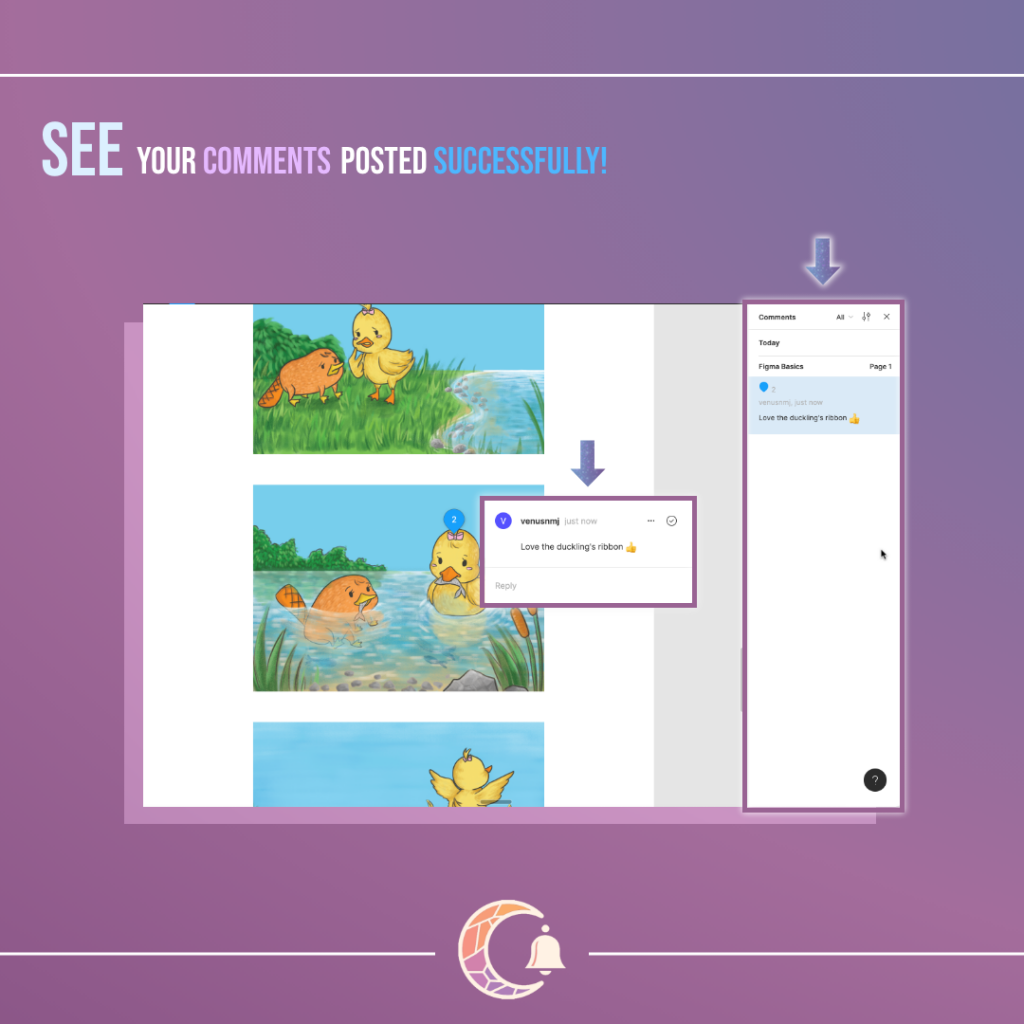
Completed!
You should be able to see your comment on the frame itself or on the right panel whenever your mouse is in the commenting cursor mode.
Conclusion
This marks the end of Figma features that you can’t find in Adobe XD. As someone who knew nothing about Adobe XD a year ago, now uses Adobe XD like it’s my favourite software for all my designs. There are also things that Adobe XD can do that Figma is not able to do like masking. Hope you learnt how to use Figma better but don’t let this article stop you from exploring more prototyping tools out there. Keep exploring and learning!
Remember to check out our other post on Amphibi Studio and our Instagram @dreambellteam!