
This is a two-part series for animations in Unity. Today, we will learn how to set up triggers to play your animations imported to Unity.
First, go to your Animator tab through Windows > Animation > Animator. Create one Empty state first by right-clicking > Create State > Empty. Name your empty state to something recognizable like “Idle”, “Inactive”, etc.
Then, create a Blend Tree state by right-clicking > Create State > From New Blend Tree. Once again, name this state to something recognizable like “Active”, “Moving”, etc.
Next, go to the Parameters on your left and create a boolean. Name this bool something simple to type while programming like “isActive”, “isMoving”, etc. Right-click on your Empty state and click Make Transition. Drag the arrow to your Blend Tree state. Do the same from the Blend Tree state back to the Empty state.
Click on the transition arrow pointing to your Blend Tree state and turn off Has Exit Time on the Inspector. Pull down the Settings tab just below Has Exit Time and set the Transition Duration to 0s. Do the same to the transition arrow pointing to your Empty state.
On the transition arrow pointing to your Blend Tree state, click the + sign to the bottom right of Conditions. Set the boolean you create in Step 1 and set it to True. Do the same for the transition arrow pointing to your Empty state but set the condition to False instead of True.
Afterwards, double-click on the Blend Tree state to edit it. Click on your Blend Tree node and create two float parameters named “X” and “Y”. These will check which direction the player is moving in. On the Inspector, set the Blend Type from “1D” to “2D Simple Directional”. Change the Parameters to “X” on the left and “Y” on the right.
In the Motion setting in the Inspector, create as many Motion Fields as you need by clicking the + sign on the bottom right. The amount of Motion Fields you need to create depends on how many sprites you have. In our case, we have four: Back, Front, Left and Right, so we will create four Motion Fields.
Now, add your sprites to your Motion Fields. Edit the Pos X and Pos Y fields with either 1, 0 or -1 depending on where your object will be moving. Example: When our character is moving up, Pos X is set to 0 since it won’t be travelling along the X-axis, and Pos Y will be set to 1 as it will be moving up the Y-axis. Do this with all your Motion Fields.
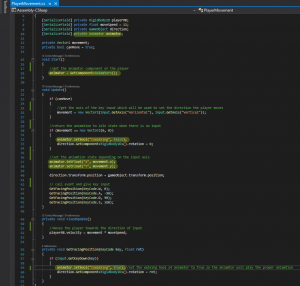
Let’s get to some programming! Create a new C# program and open it in your C# Editor.
Declare an Animator variable and use GetComponent<Animator> in Start() to attach the Animator component on your game object to the script.
In Update(), create an if statement with .SetBool() to set the boolean created in your Animator Parameters to False when there is no movement (new Vector2 (0,0)).
Add two .SetFloat() statements in Update() to check for both the “X” and “Y” Parameters and link it to the movement of your game object. Add another .SetBool() statement in Update() with an if statement to set your Animator Parameters boolean to True when movement is detected.
Once you’re done, attach this script to your game object.
And you’re done! If you followed everything through, you should be seeing what is shown in the video here of the end product! Thank you for your time and I hope you learnt something from your experience here!