Intro
Welcome back to Chicken Time! Chicken Time is a simple mobile game reminiscent of Snake.
We’ll be posting a series of tutorials every weekday! At the end of the series, you’ll have your own version of Chicken Time that you can play on any Android mobile device 😉
Missed the first part of this tutorial series? You can check it out right here!
_________________________________________________________________________________________________________
If you want to jump right into this tutorial without having to set up your own environment, or you just want to follow exactly what we did, go ahead and import this package into your project. It contains all the assets you’ll need, along with a ready-to-use scene!
Note: Import the Post-Processing package using the Unity Package Manager after importing the aforementioned package.
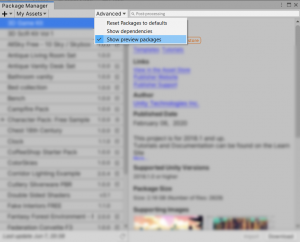
If you can’t find it, make sure that “Show preview packages” is enabled!
In today’s tutorial, we’ll be covering how to spawn cute chicks to to follow our chicken around, as well as ways to lose the game. It can’t always be about winning, right? Without further ado, let’s dive right into it!
_________________________________________________________________________________________________________
Step 1: Create “Game Over” Screen
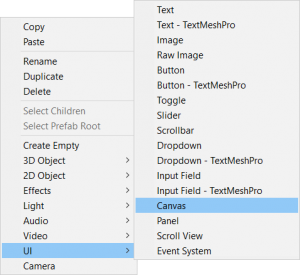
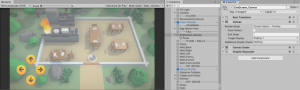
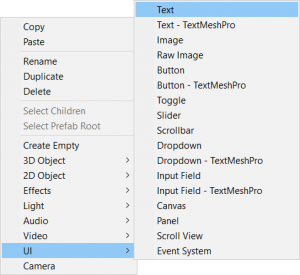
We will be creating a “Game Over” screen for our game. First, we need to create a UI canvas by right-clicking the hierarchy window and create a canvas as shown below.
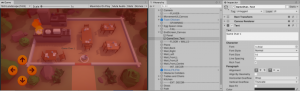
Next, we have to change the sorting order of the canvas. Simply put, the sorting order is a value which determines how forward it will render on the screen (like Photoshop layers!). The higher the sorting order, the further forward it will be rendered or shown.
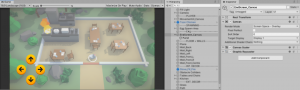
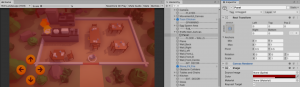
See how the translucent white canvas covered the buttons when the sorting order was changed from 0 to 1? This will ensure that the game over screen appears over the buttons to indicate that game has ended!
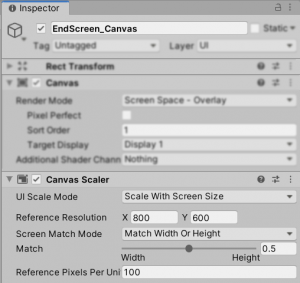
Next, we will change the UI Scale Mode of the canvas we just created to “Scale with Screen Size” in order to keep the “game over” overlay consistent with all screen sizes.
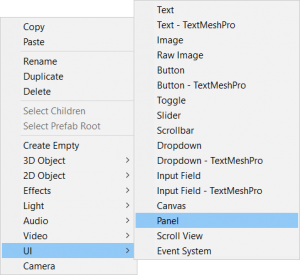
Next, we will add a translucent dark red colour to the game over screen. Begin by creating a panel under your canvas as shown below. The new panel should be part of the canvas you created.
Under the image component, we will change the source image to none to remove the default image. Then, change the color to your desired dark red. However, make sure to lower the opacity of the colour so it’s not fully opaque.
![]()
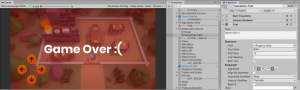
It should look something like this.
Let’s add some text on your game-over screen! Create a text object under the canvas, similar to the panel we created just now.
Under the text component, change the text to “Game Over” or any text you want to use for a Game Over.
We have to make the text big and readable as right now, it’s quite small and it’s a ghastly grey. You can use our settings to set your text or play around and see what works for you.
Since this is a game-over screen, we don’t want it to be seen the moment we play the game, so disable it after creating the game over screen.

Step 2: Chicken Stats Script
Now it’s time to go back to the ‘ChickenStats script’ we created before.
If you have imported the Unity Package, it can be found under Assets > Scripts.
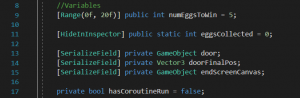
In the script, create a variable to store the “Game Over” canvas we created.
You can copy it here:
[SerializeField] private GameObject endScreenCanvas;
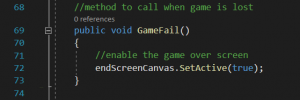
Next, in the same script, we will create a new method called ‘GameFail’ which will enable the game over screen when it is called.
 Feel free to copy the code here:
//method to call when game is lost
public void GameFail()
{
//enable the game over screen
endScreenCanvas.SetActive(true);
}
Step 3: Adding the GameFailListener
If you have imported the Unity Package, edit the ‘GameFailListener’ script. This can be found under Assets > Scripts.
If you have not imported the Unity Package, create a script called ‘GameFailListener’.
We will attach this script to the objects in our environment. If another object collides with an object with this script, it will check if the colliding object has the ChickenStats script.

- Line 10 checks if a ‘ChickenStats’ script has been detected.
- If there is, line 12 will then call the GameFail method in the previous step.
You can copy the code here:
//When the chicken bumps into the object that this script is attached to, call the game fail method
private void OnCollisionEnter(Collision collision)
{
if (collision.gameObject.GetComponent<ChickenStats>())
{
collision.gameObject.GetComponent<ChickenStats>().GameFail();
}
}
Step 4: Ending the game
Now that we have set our scripts up, we need to consider which objects should have the GameFailListener script so when our chicken bumps into it, the game will be lost. We should only put it on objects that our chicken is able to bump into.
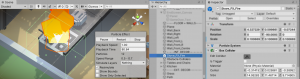
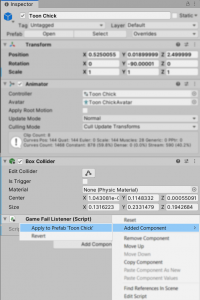
Let’s add the collider to objects that are on fire, like the stove.
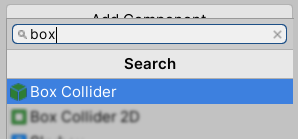
Here’s what it will look like.
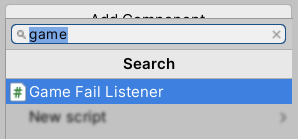
Next, add the GameFailListener script to the fire.
Simply repeat this process to other objects if you wish to do so. You can bump up the difficulty of the game by adding the GameFailListener script to the walls or more objects in the scene. Design the game as you see fit, but don’t make it too hard!
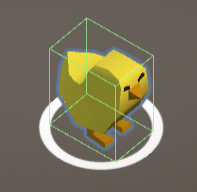
Step 5: Time for the chicks!
Now we want some chicks to spawn behind us when we collect our eggs. These chicks will follow your chicken as they try to deal with the increasing line of chicks. Just like in Snake!
To get a better idea of what we are referring to, check out this gameplay video of Meerca Chase, a Neopets-themed snake game, demonstrating the aforementioned mechanic!
There’s a bit of coding to do from here, so try to keep up!
If you have imported our Unity Package, you can find the script under Assets > Scripts.
If you have not imported the package, create a new script called ‘ChickenSnake’.
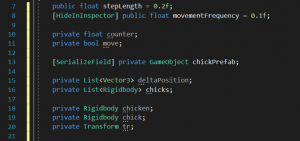
You can copy them here:
public float stepLength = 0.2f;
[HideInInspector] public float movementFrequency = 0.1f;
private float counter;
private bool move;
[SerializeField] private GameObject chickPrefab;
private List<Vector3> deltaPosition;
private List<Rigidbody> chicks;
private Rigidbody chicken;
private Rigidbody chick;
private Transform tr;
Now, let’s create a method to spawn a chick object.

Copy the method here:
//method that adds a new chick
public void createNewChick()
{
GameObject newChick = Instantiate(chickPrefab, chicks[chicks.Count – 1].position, Quaternion.identity);
newChick.transform.SetParent(transform, true);
chicks.Add(newChick.GetComponent<Rigidbody>());
}
Next, we have to make the chicks follow our chicken when it moves. Add in this method to get the chicks to trail behind our chicken.
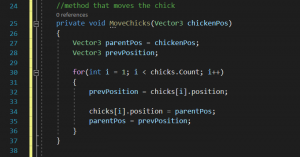
Feel free to copy it here:
//method that moves the chick
private void MoveChicks(Vector3 chickenPos)
{
Vector3 parentPos = chickenPos;
Vector3 prevPosition;
for(int i = 1; i < chicks.Count; i++)
{
prevPosition = chicks[i].position;
chicks[i].position = parentPos;
parentPos = prevPosition;
}
}
Step 6: Your chicks are a problem…
Your chicks aren’t just for show, even if they are absolutely adorable! Remember how in Snake, the trail you leave is an obstacle you have to avoid? Well, your chicks are no different. Attach colliders and the GameFailListener script to your chicks.
Make sure to apply the new collider to the prefab so each chick spawned will have the same collider!
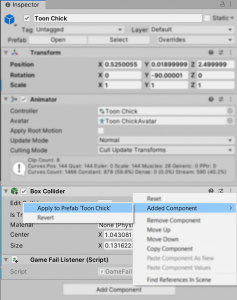
Just like before, add the GameFailListener component to the chick and apply it to the prefab. This will make it so that bumping into your chicks will result in a game over.
 And we’re done, good job on keeping up!
The ChickenSnake script used in this tutorial is based on this tutorial we found! He provides very detailed explanations behind his code, so do check out his video!
Congratulations! If you have reached this point, your Chicken Time should be fully functional.
Check back in for tomorrow’s tutorial on implementing Menu UI and making our game look pretty! Hang in there, we’re almost at the final stretch of this wonderful game-making journey! <3
_________________________________________________________________________________________________________
If you’re interested in finding out more about the game dev process, do follow our Instagram page @noodletsstudio! Not only will we be posting updates on the game we’re developing, we’ve also been putting up handy dandy tutorials on different aspects of game development. Currently, we have some tutorials on simple particle effects and mobile joystick movement up! Do check us out 😉