Weapons are a staple in most aspects of life. People use weapons to hunt for food, attack things, and defend themselves. Thus, It’s imperative in most games or movies that your character needs a weapon.
But how do you go about conceptualizing a weapon, you might think? Well, look no further, because we will be going through a step-by-step guide on how we, here at projectJ2K, would create a weapon design.
This tutorial’s premise focuses on the creation of weaponry that is meant to be used by the characters in the sequence and the other beings in the plot who are supposed to populate the world that the project will be depicting for its audience.
 ____________________________________________________________________________
1st Step: Planning & Preparing your Tools
Plan for what you want to create. Where are you going to draw on? How big will it be? What type of weapon do you want to draw? What will it look like?
You have to understand how to customize a particular weapon for the main characters. This will also depend on the nature of the character.
In this tutorial, We will be using Photoshop, with an artboard size of 1080x1080px, to create a stylized sword. I own a drawing tablet for school, so I will be using that as well.
However, You could go with some alternatives to create your concept art!
____________________________________________________________________________
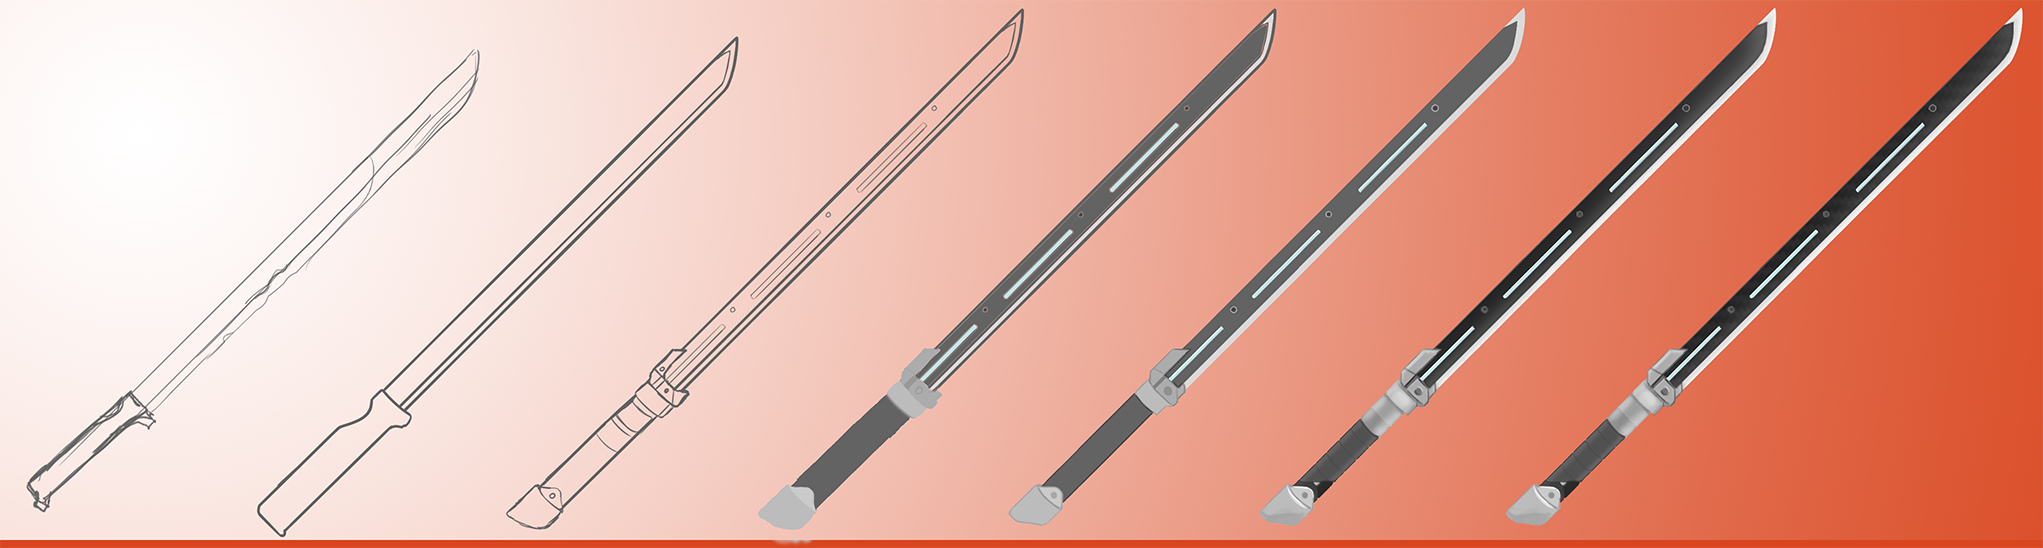
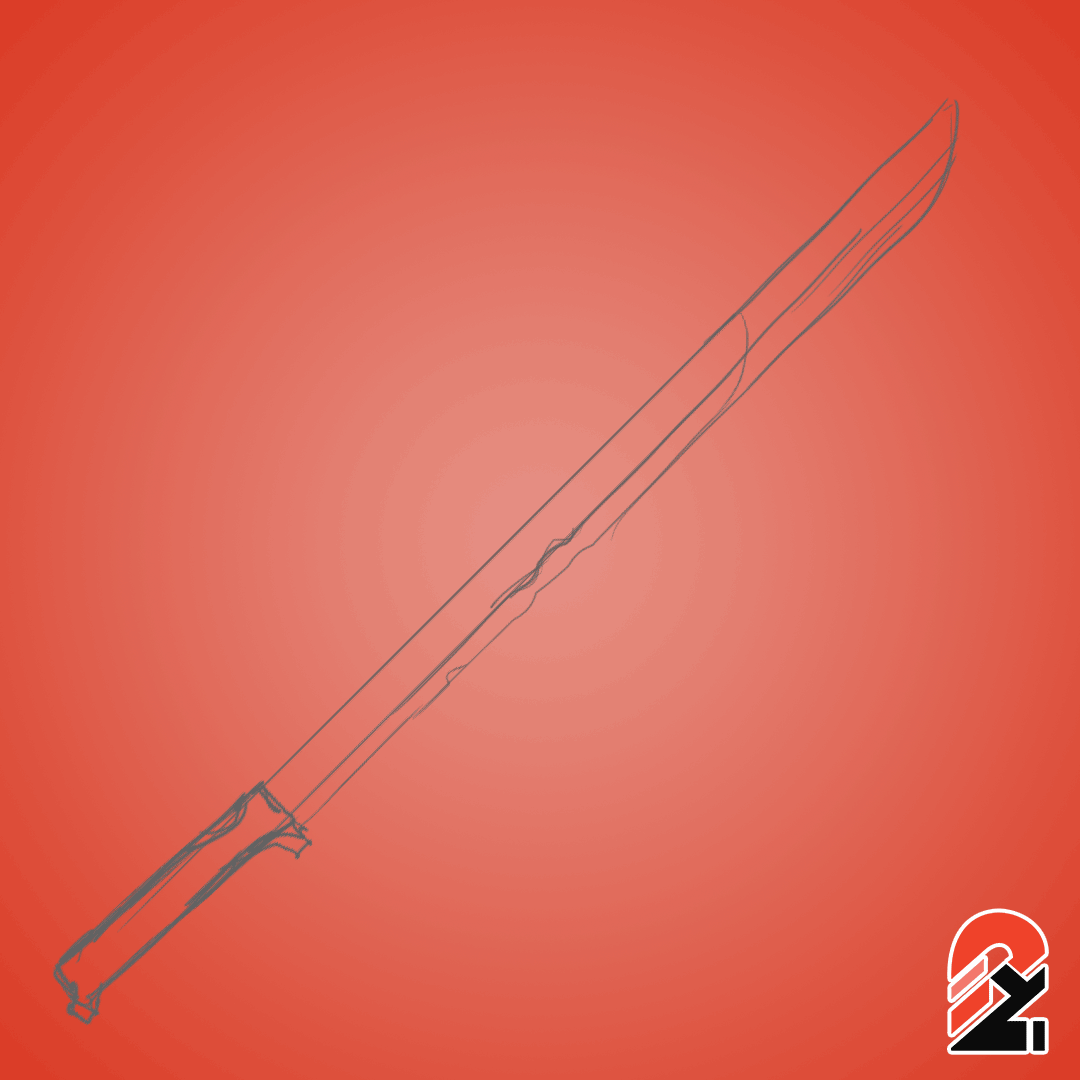
2nd Step: Start Sketching the Weapon!
Begin your simple sketch of the weapon, outlining the shape of the weapon, and then refine the outline. Remember to spare the major details, for now, because you’ll be adding those later!
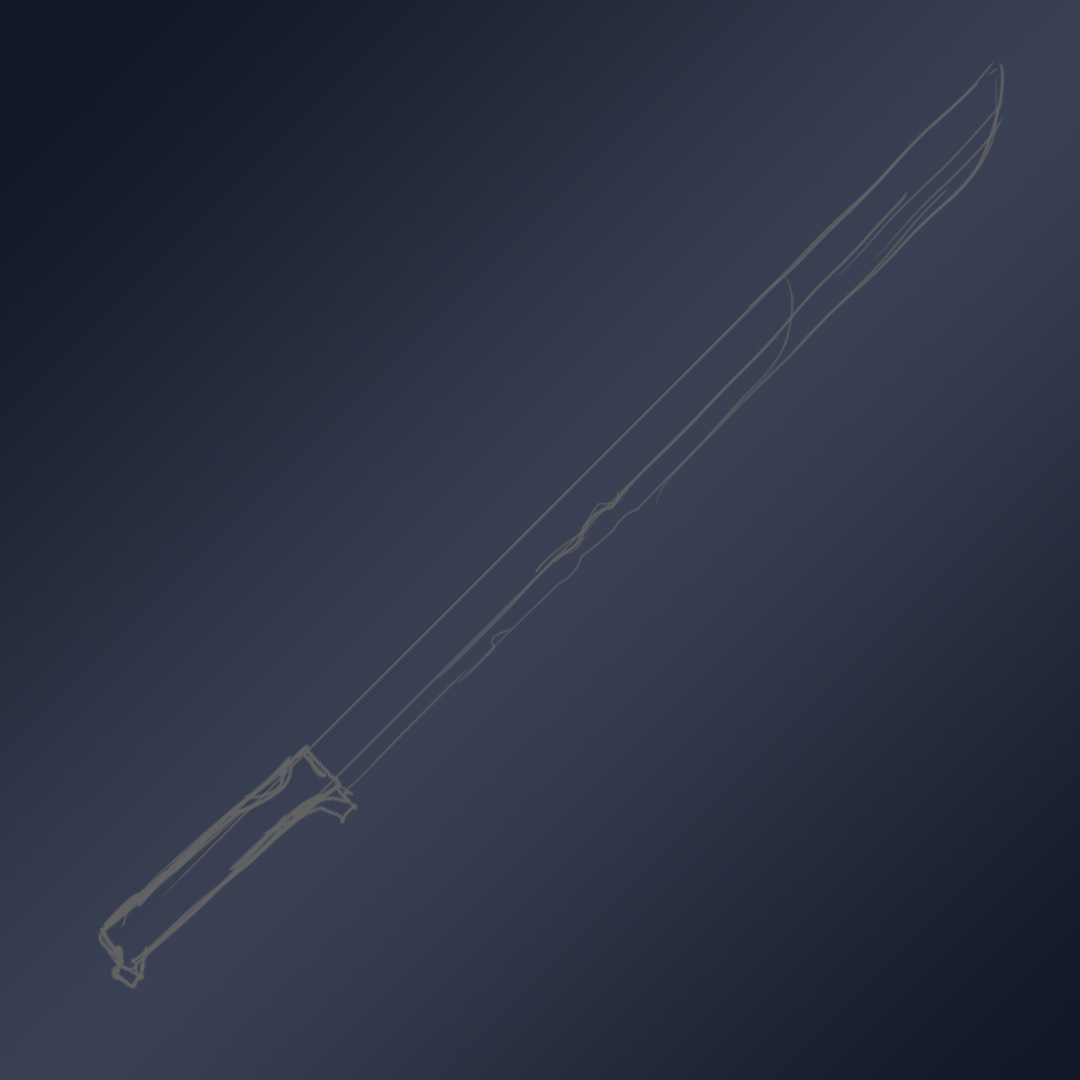
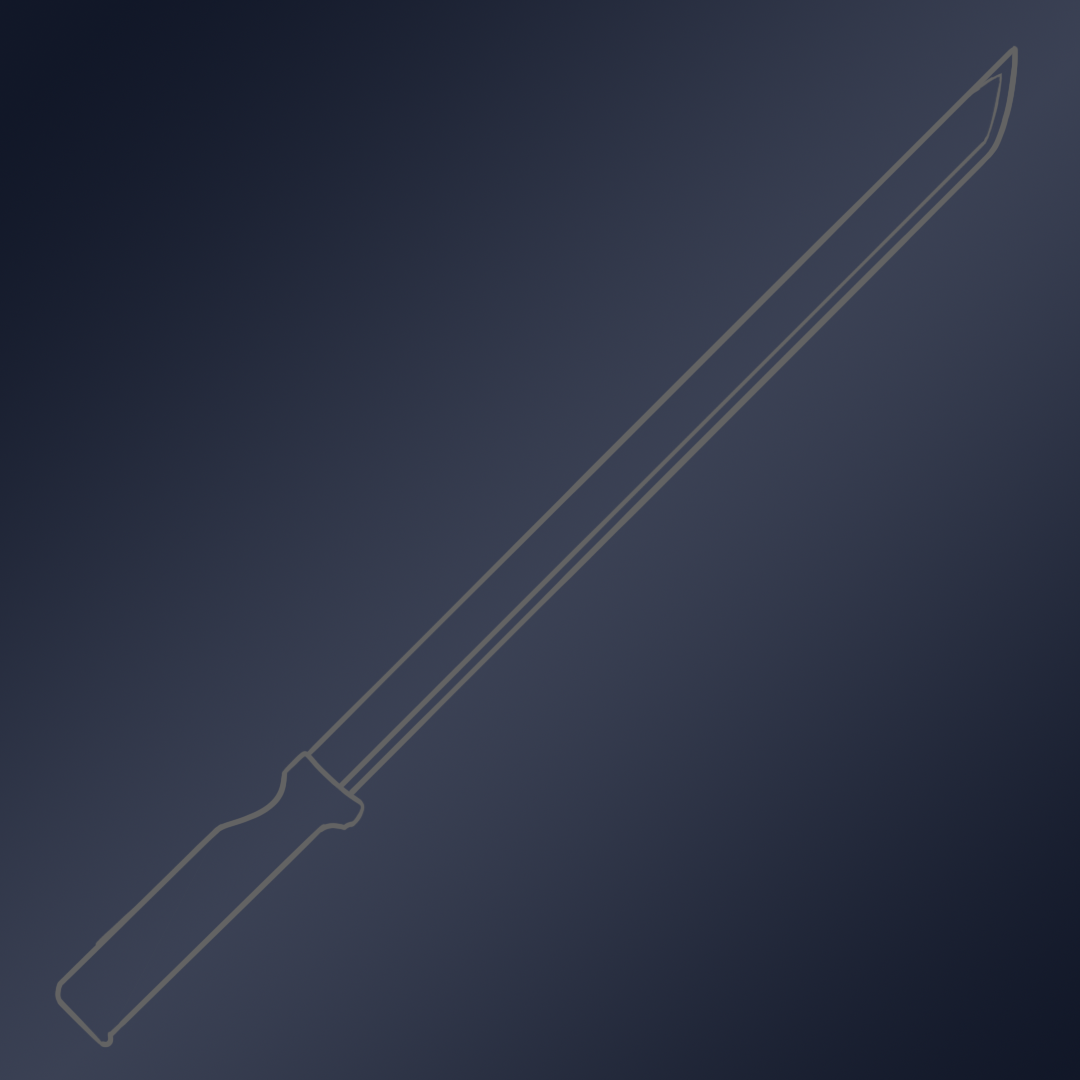
It would be best to use a soft brush affected by pressure, to draw the sketch, and a hard brush with smoothing enabled to create a clean outline.
Tip: Remember to save constantly, Use different layers, and to use Inspiration.
____________________________________________________________________________
3rd Step: Add Details to it!
Add major details to the weapon, maybe the design of the handle, or the grooves of the blade.
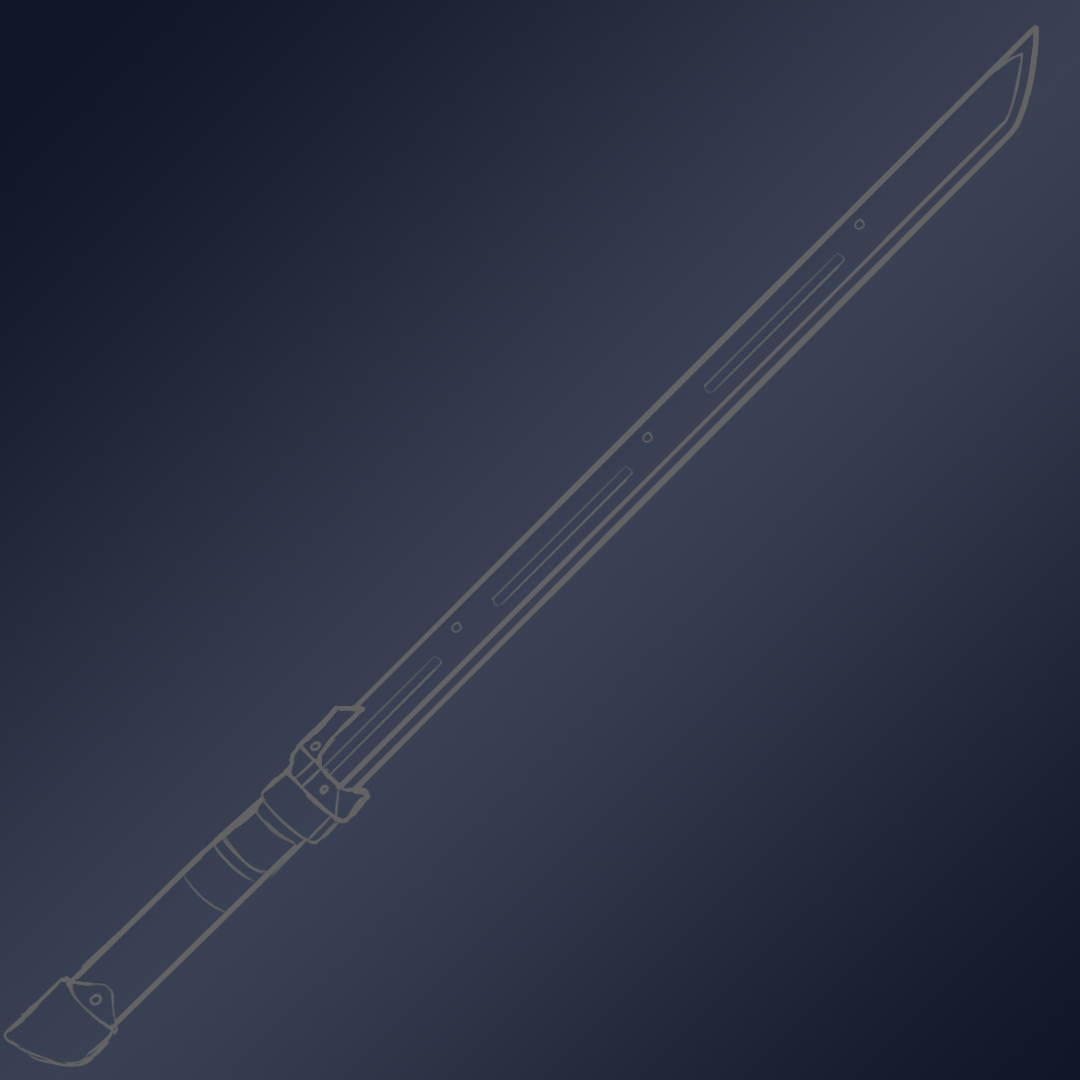
Use a hard brush to add details. Try to add your own touch and experiment with different looks!
____________________________________________________________________________
4th Step: Add Base Colour to the weapon!
Start coloring the weapon, try to keep between the lines. You can use any color palette to make the weapon come alive.
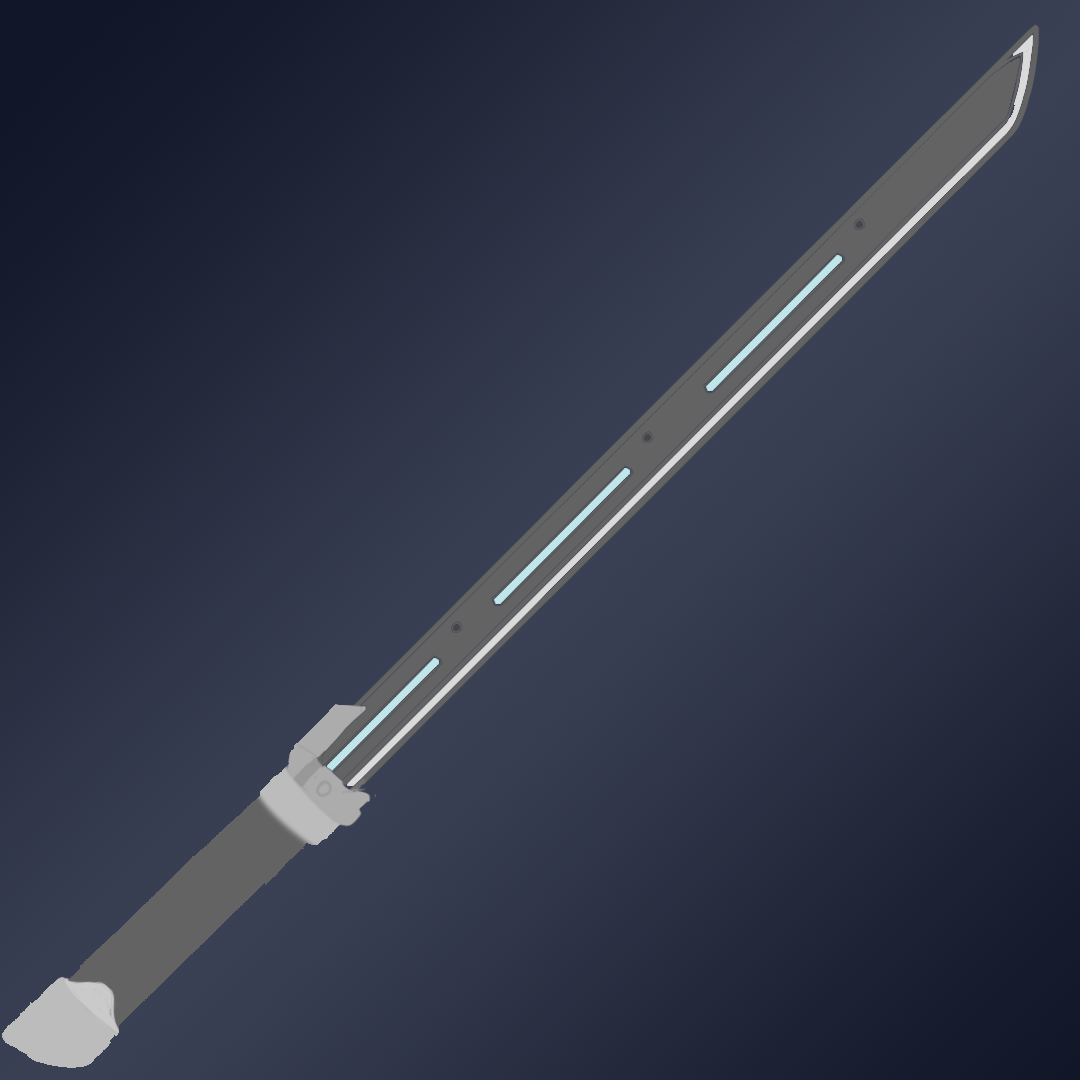
Use a hard brush to add the base color; you could use a layer mask to help keep the paint in between the outlines.
You could also use the paint bucket to quickly fill in the gaps.
Tip: Zoom in to make sure there aren’t any empty spaces within the weapon.
_______________________________________________________________
5th Step: Refine the Outline
Outline the Coloured version of the weapon now.
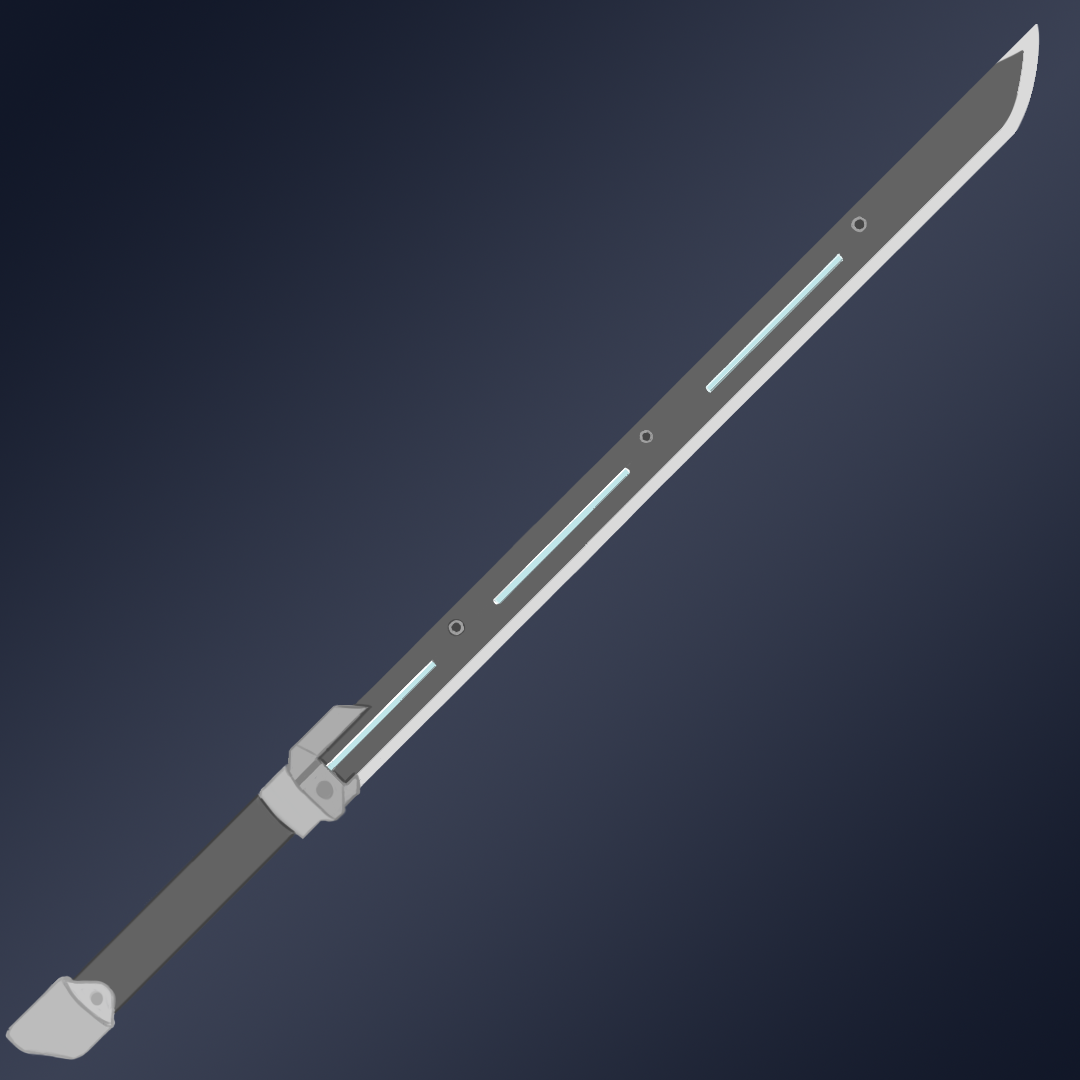
Use a thin hard brush with pressure on to let the lines end off sharp. We used a layer mask to clean up the edges of the sword.
____________________________________________________________________________
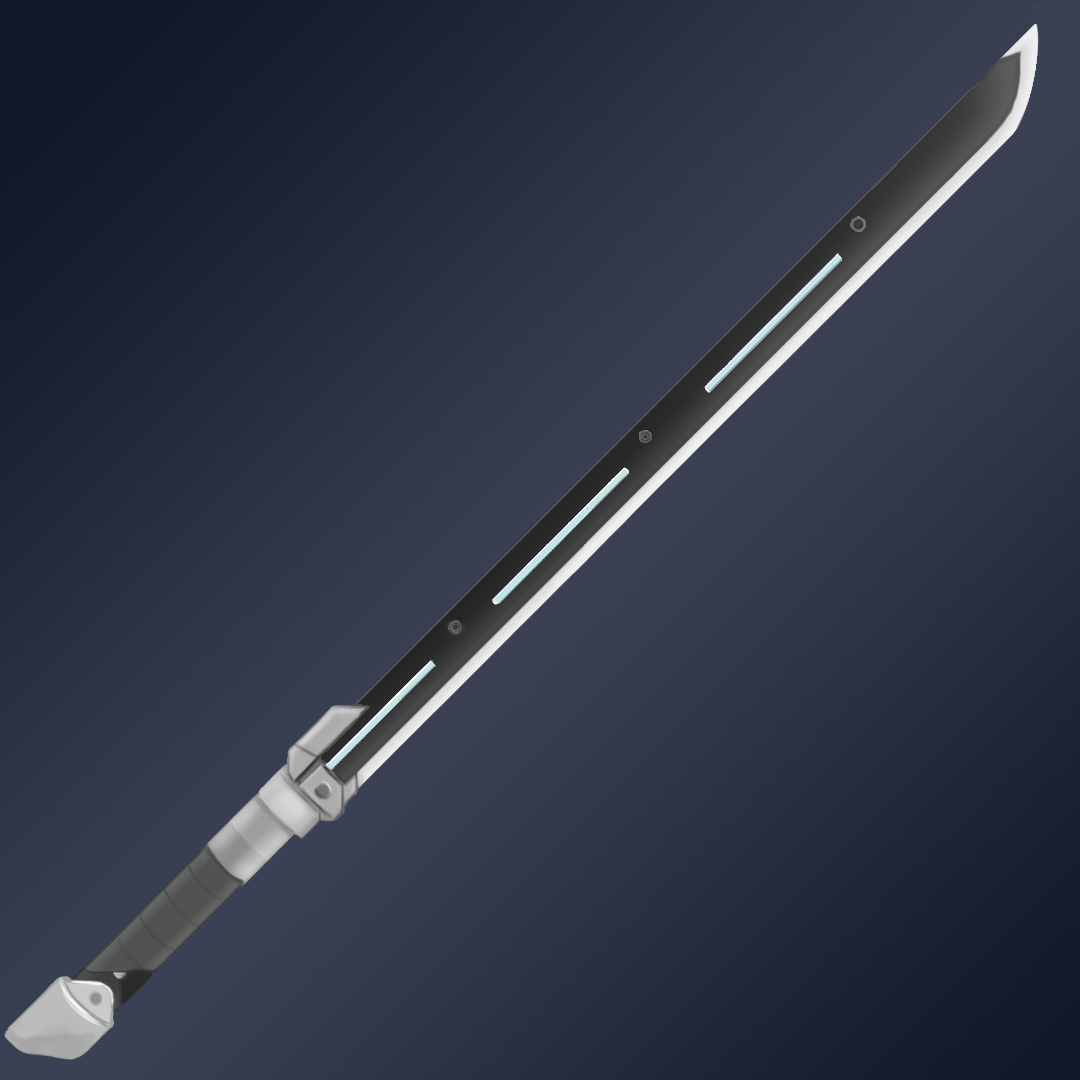
6th Step: Shading and Lighting for the Weapon
Shade the handle and edges with a Black Coloured Soft Brush, on a new layer with 10% opacity. On this layer, Colour the areas that you want to be shaded with blank paint. With the layer set to 10% opacity, the black paint will mimic shadows.
Then, do the same thing on a new layer but with white paint this time to resemble light.
____________________________________________________________________________
7th Step: Texturing the Weapon
We used the magic wand tool to select the blade portion, and then we clicked the layer mask to set a mask over the blade portion. We then went to google to find a carbon fiber material.
We then imported the carbon fiber material onto the project and we put the layer mask on it.
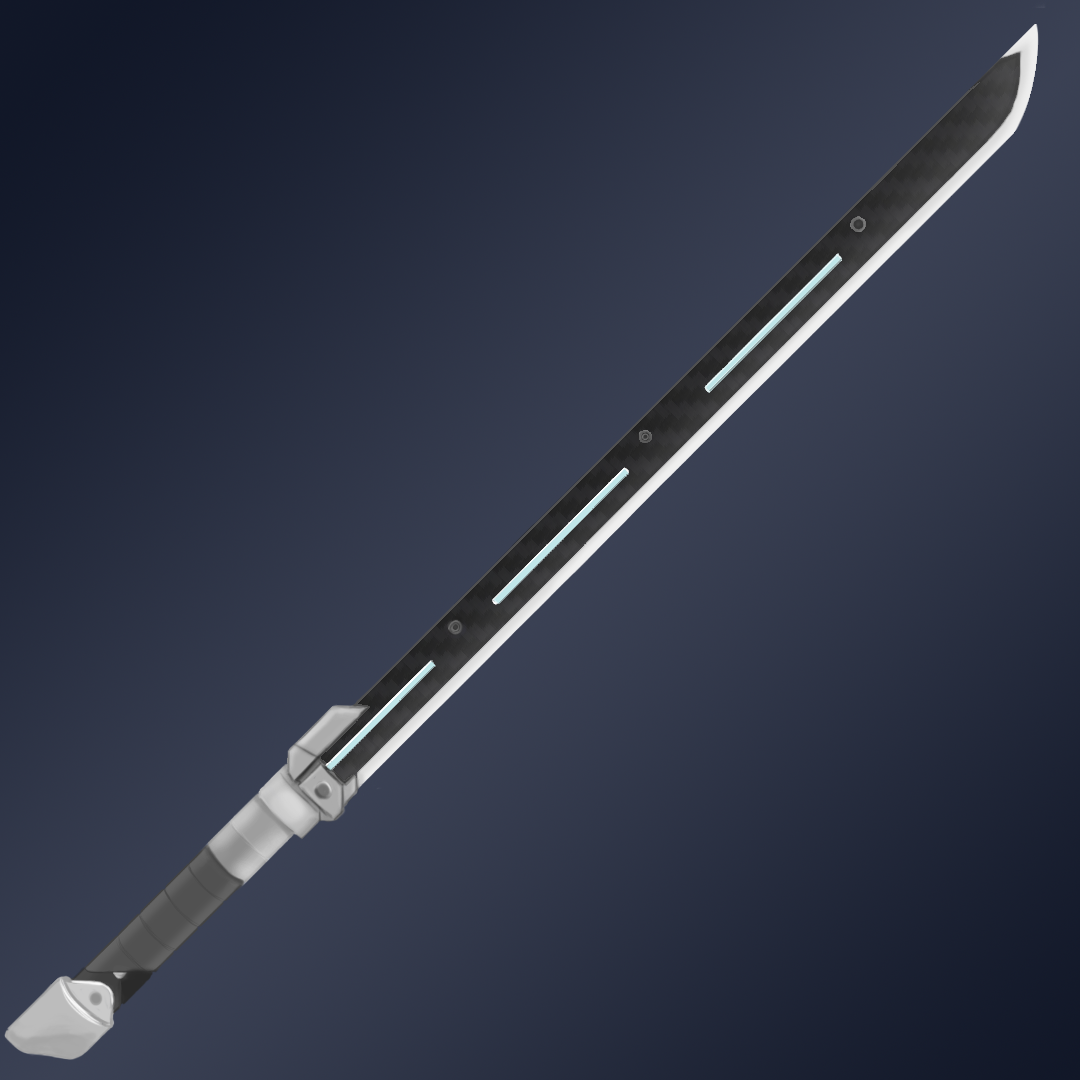
This gives it a textured look. Feel free to do the same with other materials! Eg. Stone, Metal, Wood.
____________________________________________________________________________
And You’re Done!
Congratulations! You’ve drawn your first weapon! Feel free to try with other weapons!
What now?
You’ve got a grasp on the basics of weapon design, and have the means to create your weapon concept art. We hope you learned something, we hope you keep practicing and experimenting with different weapons.
Stay Tuned for tomorrow when we focus on another type of concept art, Character Design! or Check out our previous tutorials on Sound Design!
Sound Design Part 1: Introduction
Sound Design Part 2: Making a Melody
Follow @amphibistudio and @projectj2k on Instagram for more updates!